Chargify.com gives the ability for recurring billing and subscription-based charges. It supports integration with several payment gateways. In this document we are explaining how to generate Chargify API key for a domain/sub-domain name. Chargify API key is required to integrate Chargify through code:
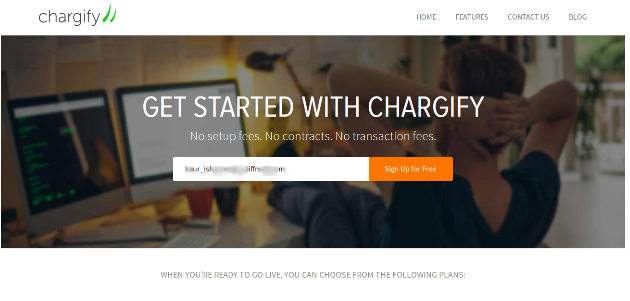
1.Create account on Chargify. For creating an account on Chargify, open the link: www.chargify.com
2. Click on Sign Up For Free button as shown in the screenshot:

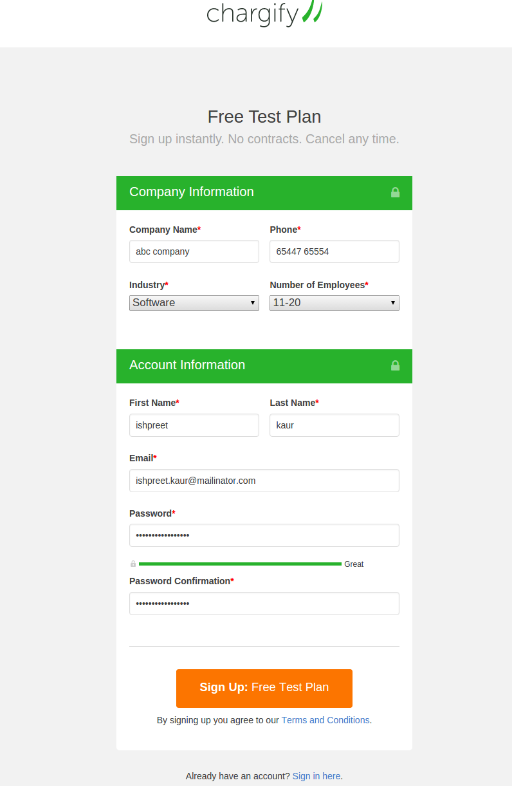
3.Now, enter an email address:
4.Enter, required information as mentioned on Chargify Form:
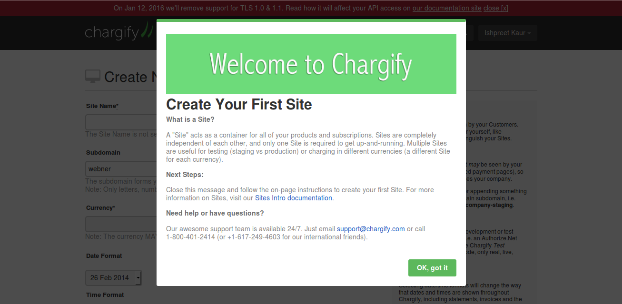
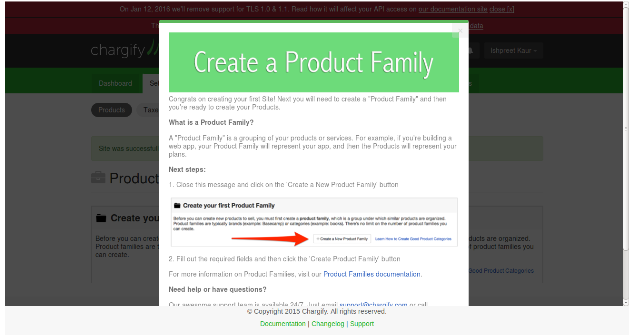
5.Now, pop-up will be opened to create your first site. Click on “Ok, Got it”:
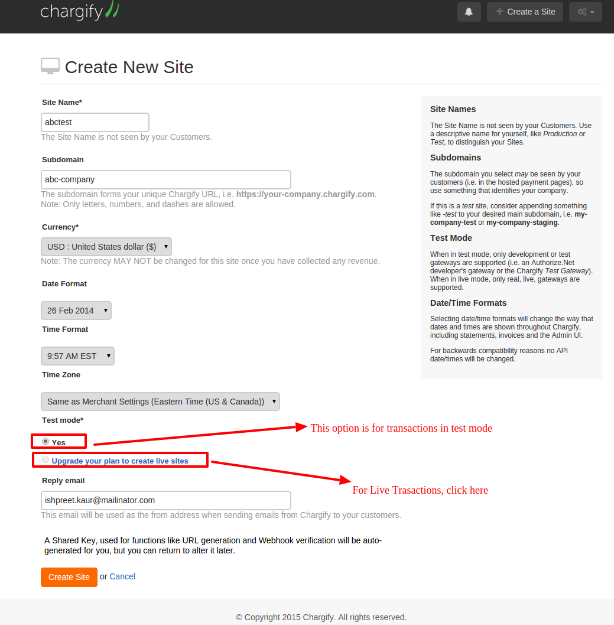
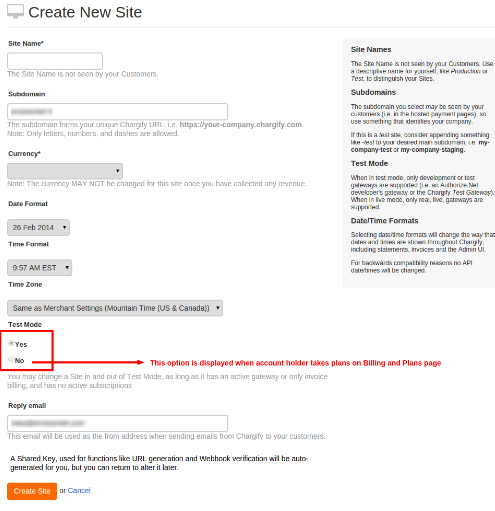
6.Sites are containers for Products, Subscriptions and Customers. More than one site can be created in single account. Most merchants will prefer to have minimum two sites, one for testing and one for production. For both sites, domain will be different, gateway settings and other settings will be different. You can also create more sites for your different websites. For example, you(merchant) have two websites: abcone.website.com and abctwo.website.com . For these two different websites, you can create two sites on chargify. API key will be same while integrating your different websites with chargify, but sub-domain name will be different for two sites in chargify.
7.For test transactions, click yes radio button under Test Mode and click create site button:
8.After clicking create site button, following screen will be opened. Now, you can create products (plans):
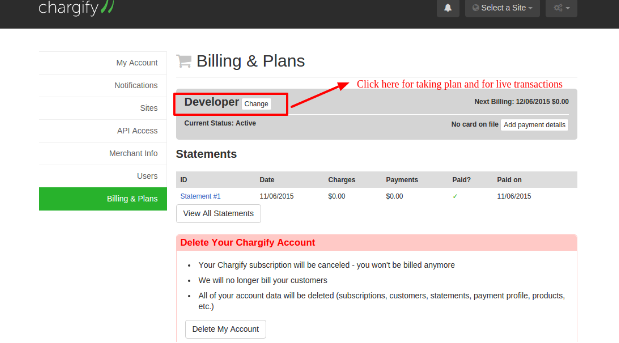
9.For Live site, click on Billing & Plans at Left and then click on Developer change button as shown in following screenshot:
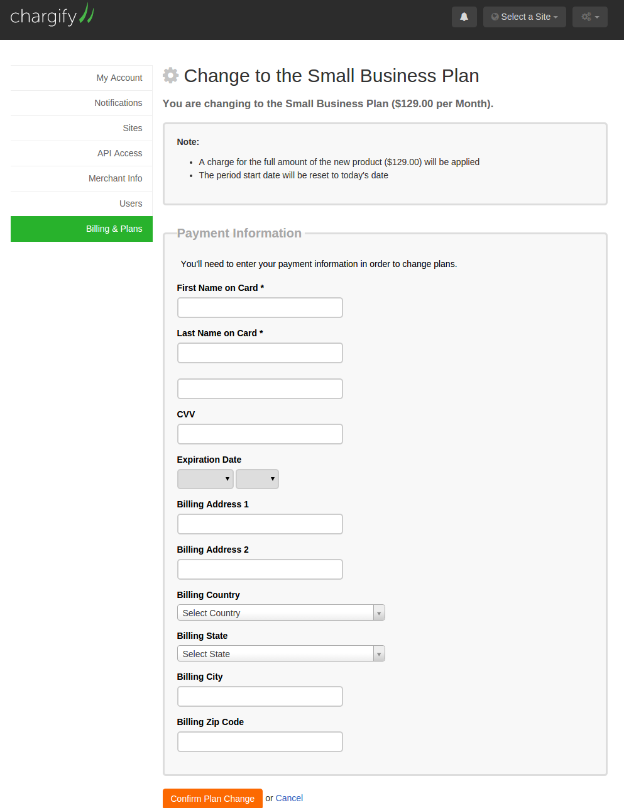
10.Select the plan you want:

11.Enter credit card information and click Confirm your plan:
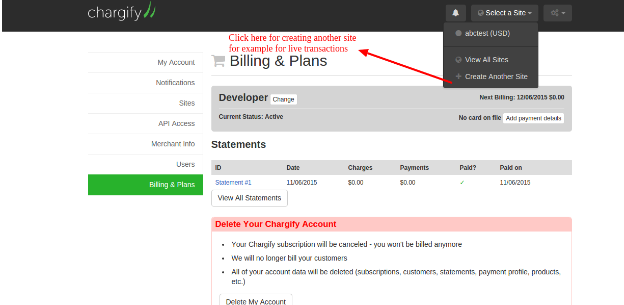
12.Now, you can create another site by clicking on “+Create Another Site”:
13.Now, After payment to Chargify, you can decide if you want to enable “Test Mode”:
14.Click on Yes Radio button for Live site (live transactions) and click on Create site button.
15.Two sites are displaying as:

16.For connecting sites with Gateway, Select any site (for example select test site), Go to Settings:
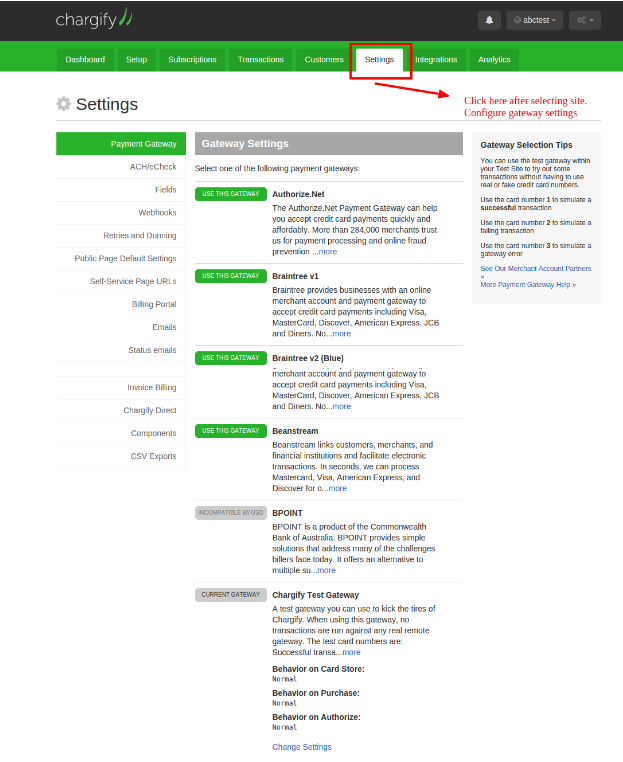
17.Click on, for example, configure Braintree Gateway, as per requirements.
18. Enter required information and save credentials.

19. Enter Braintree sandbox credentials for Chargify Test site and live credentials for Chargify Live site.
20. Click on tab icon at extreme top right. To check API Key, click on API Access sub-menu at left:
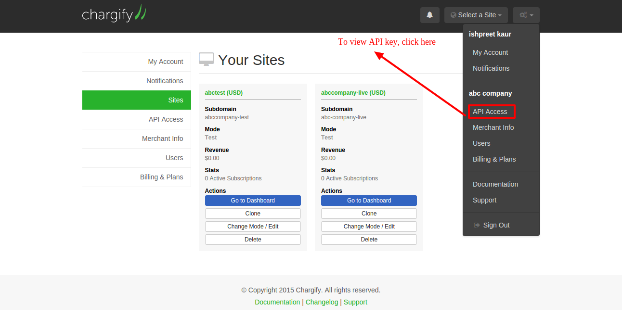

21. Now, you ready to integrate your site with Chargify using API Key and Sub-domain Name.