How to migrate an EC2-machine from one AWS account to another aws account?
Solution: To migrate EC2 machine, there are following main steps:
- Create Snapshot of the existing machine drives.
- Migrate the EC2 machine.
- Upgrade/downgrade migrated machine configuration.
Step 1: Create Snapshot of the existing machine drives.
Follow the steps given below to create a snapshot of existing machine drive you have inside AWS:
1.1. Log on to AWS console account.
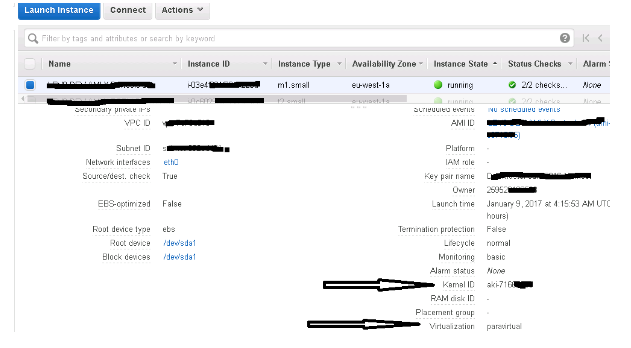
1.2. Note down the Kernel ID from EC2 machine :
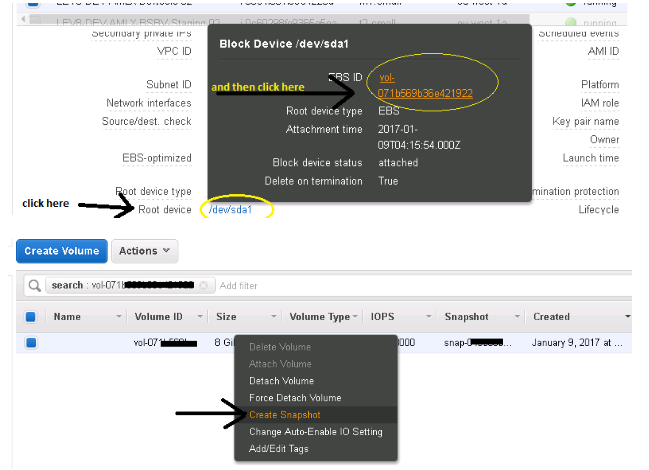
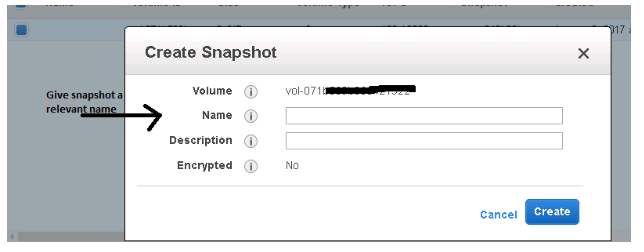
1.3. Take a snapshot of EC2 root drive as per the screenshots :
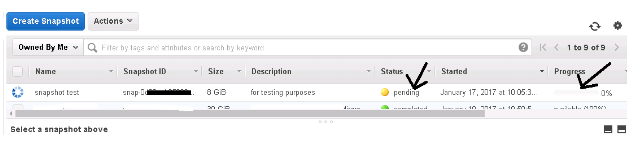
Above step will take a while depending on the size of volume for taking a snapshot. Check the progress bar:
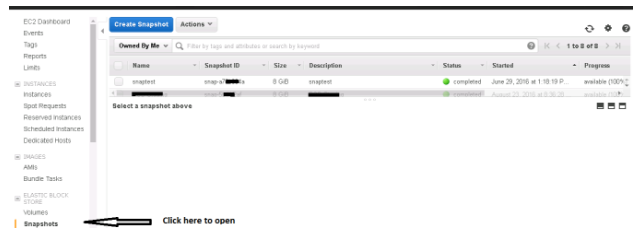
Step 2: Migrate the machine: First share the snapshot with another aws account.
2.1. Click on Snapshot option :
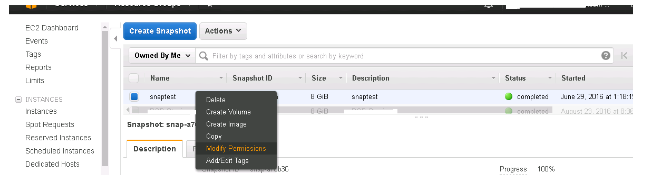
2.2. Right Click on the desired snapshot ID and select Modify permissions :
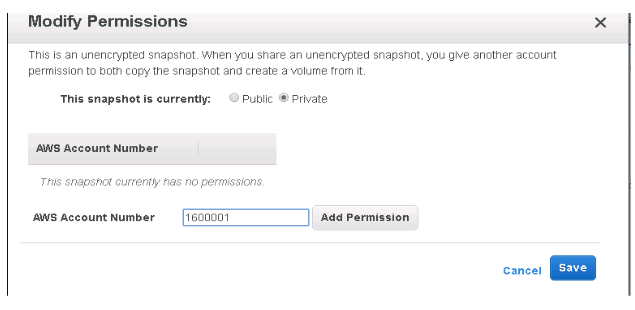
2.3. Select the option whether to share it publicly or you can share it in private :

2.4. Add the valid AWS Account Number in the provided field in order to share in private :
Step 3: Upgrade/downgrade Migrated machine configurations:
You can modify some of the machine configurations like disk size, machine type etc by using below steps.
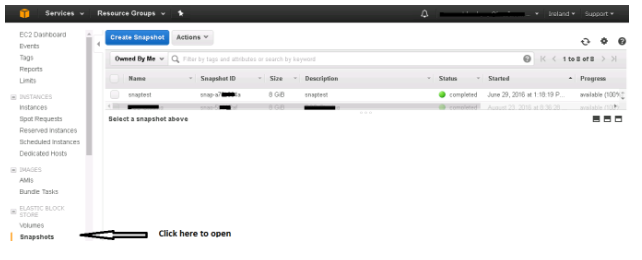
3.1. Log on to other AWS console account.
3.2. Click on Snapshots option :
3.3. Now Click on Owned by me option then choose Private Snapshots :

3.4. List of all snapshots (shared in private) will be displayed in the list now.
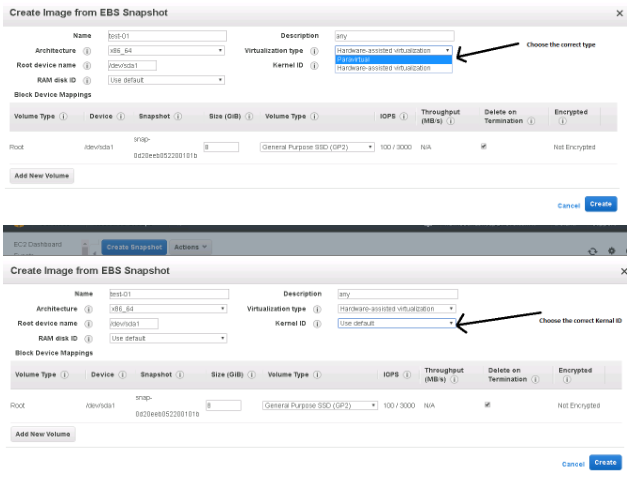
3.5. Create Image from a shared snapshot, (right click) Enter correct details :
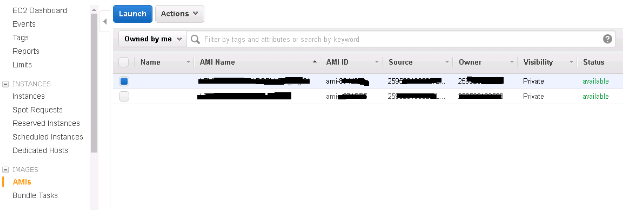
3.6. Click on AMIs in IMAGES section :

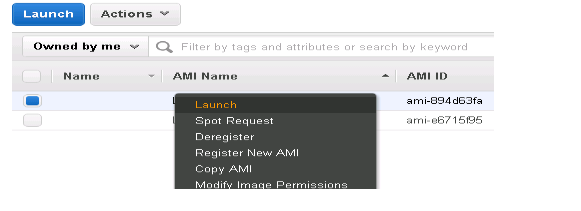
3.7. Right click on the Image you just created above :
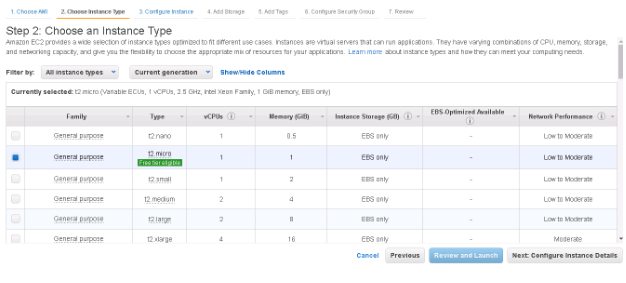
3.8. Click on Launch and choose optimum level of machine you require :
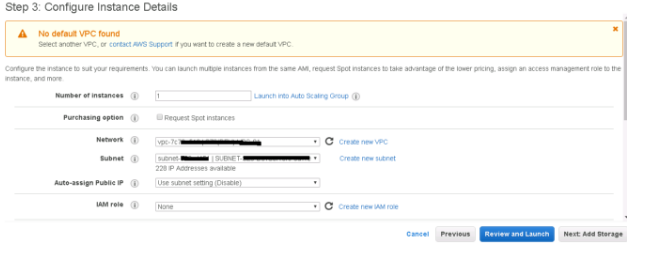
3.9. Click next to set configuration for Instance :
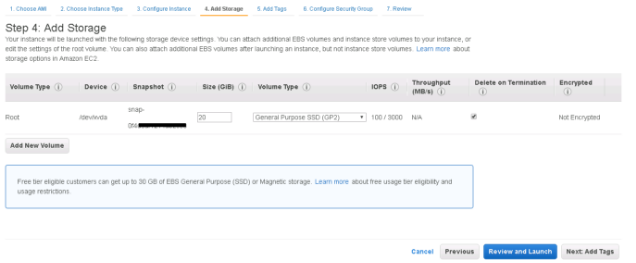
3.10. Click next and choose the size of a disk for Instance ( you can increase or decrease the size as per requirement but make sure Data size must be less than allocated disk size) :
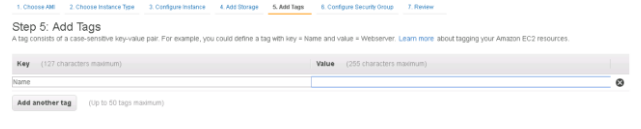
3.11. Click next and add tags (like Name for Instance) :
3.12. Click next and set security group for your Instance (select ports that need to be opened for specific IP address or IP pool) :
3.13. Click Review and Launch and your Instance will be ready in 4-5 minutes.