Step 1: Launch the developer console and add a lighting component (also known as an aura component).
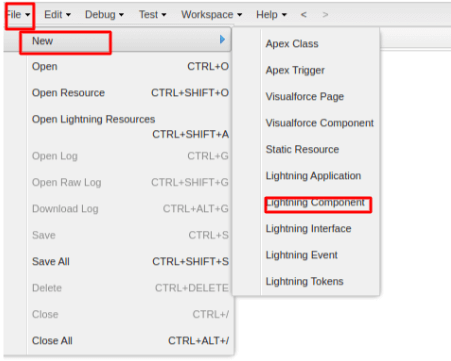
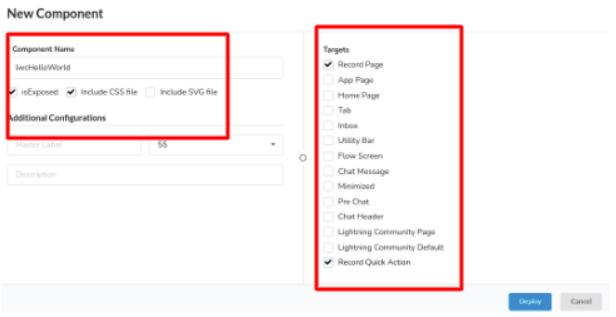
Step:2 Fill in the details in the pop-up box below and click “Submit.”

It will create a component like the one below.
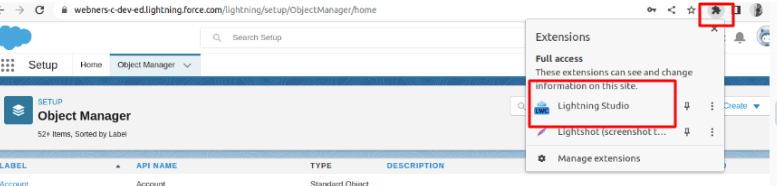
Download the below extension to create LWC.
https://chrome.google.com/webstore/detail/lightning-studio/ehkpneicmpbdejpoancidgkejlkahjgo/related
Step 3:-After signing in to Salesforce org Go to the right side of the screen, where the extensions will be, and select “lighting studio.”
Step 4:-Create and deploy LWC using Lighting Studio.
Replace the HTML with the code below.
<template>

   <lightning-card title="LWC Hello World" icon-name="custom:custom14">

       <div class="slds-card__body slds-card__body_inner">

           Hello, {name}!

       </div>

   </lightning-card>

</template>
and replace JS with the code below.
import { LightningElement, api } from 'lwc';

export default class LwcHelloWorld extends LightningElement {

   @api name;

}
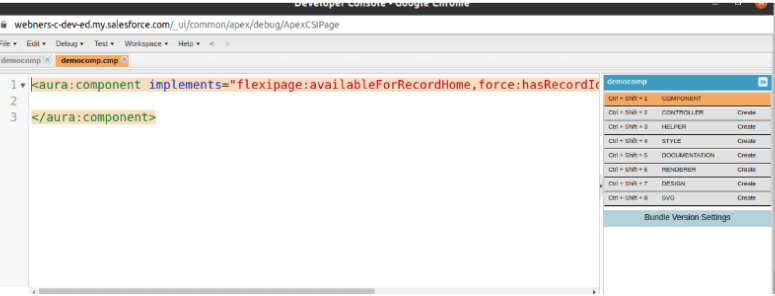
Use the following code to update the aura component:
<aura:component implements="flexipage:availableForRecordHome,force:hasRecordId,force:lightningQuickAction" access="global" >

	 <c:lwcHelloWorld name="Earthling" />

</aura:component>
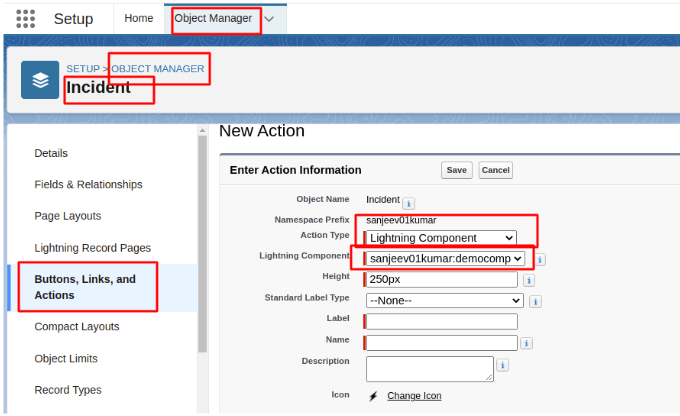
Step 4:- Make an action for an object.
Go to the object manager. Select an object, such as incidents.
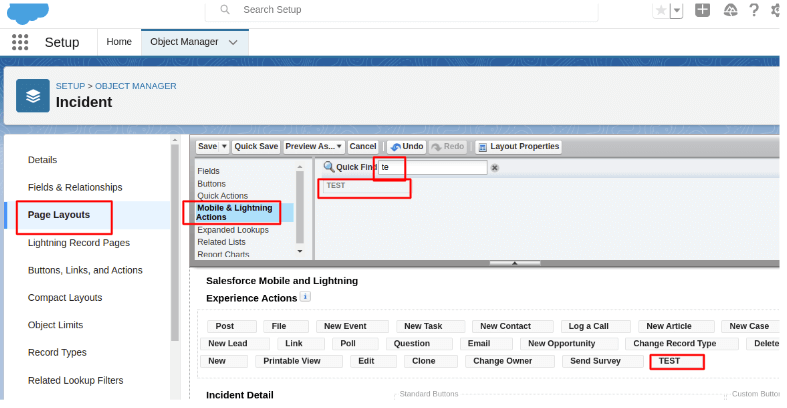
Step 5:- Go to page layout and mobile and lightning actions Drag the button to the lightning and salesforce mobile actions.
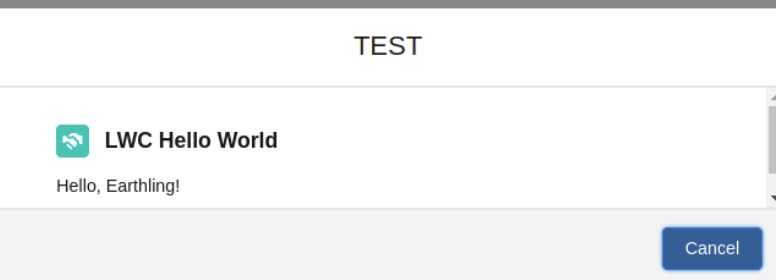
Step 6:- Go to the detail record page of the object where you added the TEST button, as shown in the screenshot below.

Step 6:- When you click the button, it will open a popup and print whatever is written in HTML, like the below-screen LWC component I have created above.
As a result, when creating an action, you can call LWC from the aura component for those standard buttons that do not allow you to directly select the lighting component.
Output:”-