How to use SimpleSAMLPhp as a Service Provider for authenticating users? Some Basic steps to start using simplesamlphp.
1. Download stable version of SimpleSAMLphp from this link:
2. Go to the directory or your workspace where you want to install simpleSAMLphp, extract the zip file. Give a name to extracted folder for example: simplesamlphp.
3. Configure Apache:
A. Run following command in ubuntu terminal:
i.
sudo gedit /etc/apache2/sites-available/000-default.conf
In 000-default.conf file, add following:
<VirtualHost *:80>
ServerName simplesaml-service.com
DocumentRoot /var/www/simplesamlphp/www/
<Directory "/var/www/simplesamlphp/www/">
Order allow,deny
Allow from all
Require all granted
</Directory>
Alias /simplesaml /var/www/simplesamlphp/www
</VirtualHost>
ii.
sudo gedit /etc/hosts
Add servername defined in above file in hosts file:
127.0.0.1 simplesaml-service.com
iii.
sudo /etc/init.d/apache2 restart
4. Edit config.php in config folder of simplesamlphp:
A. Set administrator password to access some of the pages of simplesaml web service:
‘auth.adminpassword’ => ‘setpassword’,
B. Set a secret salt:
i. Following command can be used to generate secret random string:
tr -c -d '0123456789abcdefghijklmnopqrstuvwxyz' </dev/urandom | dd bs=32 count=1 2>/dev/null;echo
ii. Now set secret salt value with string generated from above command:
‘secretsalt’ => ‘radomstringsecret’,
C. Set technical name and email:
‘technicalcontact_name’ => ‘Abc Name’,
‘technicalcontact_email’ => ‘abcexamle@mail.com’
5. Type url in browser simplesaml-service.com/simplesaml/.
6. Now, you will be able to see homepage of web service installed.
7. Install missing php library files mentioned in your home page like:
sudo apt-get install php5-mcrypt php5-ldap php5-mysql

sudo php5enmod mcrypt

sudo /etc/init.d/apache2 restart
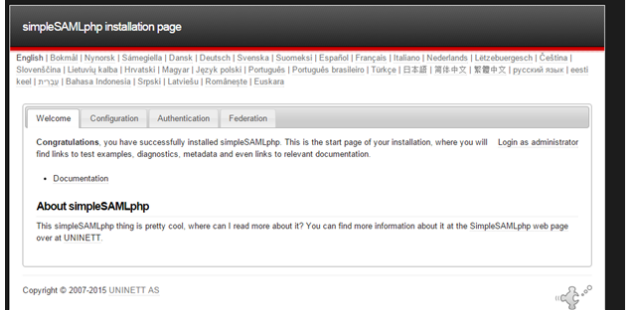
8. Homepage of simplesamlphp installation looks like:

9. For using simplesaml installation as a service provider:
A. Enable certificate for your service provider:
i. Create a folder cert in simplesaml installation.
ii. Now, run following commands
cd cert
openssl req –newkey rsa:2048 –new –x509 –days 3652 –nodes –out saml.cert –keyout saml.pem
B. Add certificate in config/authsources.php file as following :
‘default-sp’ => array
(
‘saml:SP’,
‘privatekey’ => ‘saml.pem’,
‘certificate’ => ‘saml.cert’,
),
10. Add Identity Providers to your service provider:
A. Following lines are by default included in file metadata/saml20-idp-remote.php:
metadata[‘https://openidp.feide.no’] = array
(
'SingleSignOnService' => 'https://openidp.feide.no/simplesaml/saml2/idp/SSOService.php', 'SingleLogoutService' => 'https://openidp.feide.no/simplesaml/saml2/idp/SingleLogoutService.php', 'certFingerprint' => 'c9ed4dfb07caf13fc21e0fec1572047eb8a7a4cb',
),
B. You can add more identity providers similar to above.
11. Exchange metadata with identity provider:
A. To exchange your metadata with identity provider, Go to Federation Tab of your simplesaml installation, click on show metadata, copy metadata and paste this metadata in identity provider’s configuration:

12. Test the service provider:
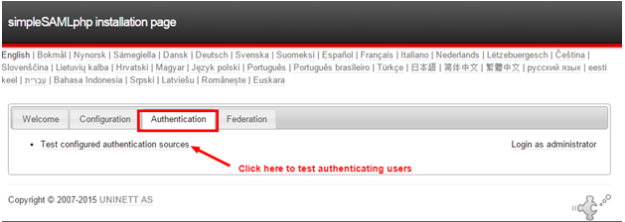
A. To test authentication, Go to Authentication tab.
B. Click on “Test configured authentication sources”.
C. To test login as admin, login with credentials mentioned in config/config.php file:

D. To test authentication of users with identity provider, click on default-sp link:

E. This will redirect to select identity providers from drop-down list.
F. Select any identity provider, for example , select identity provider https://openidp.feide.no.
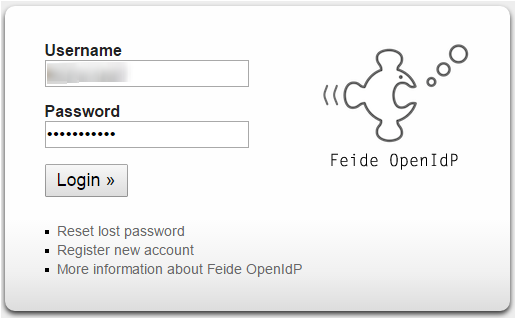
G. User will be redirected to link “https://openidp.feide.no.”. User will enter login credentials:

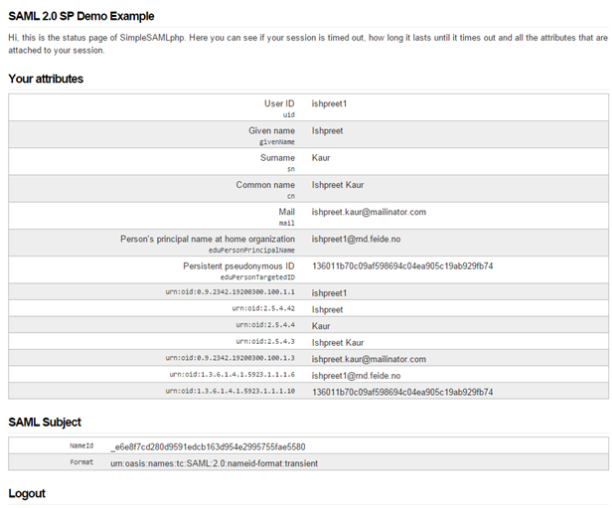
H. After Login, user will be redirected to link “simplesaml installation page” and user information will be displayed to user:

