- Install Python on windows
- Install Selenium with Python
- Configure Pycharm with Selenium
How to install Python on windows. There is a website to download Python.
https://www.python.org
https://www.python.org/downloads/
Here, click on “Download Python 3.10.7”. This is the latest version of Python.
- Once you downloaded this, you’ll get a small exe file
- Double click on this exe file
It will start installing once the installation gets done on Windows. You can check the Python installation through the command prompt also.
To check if Python is installed through the command prompt –
- In the command prompt, you need to type python and press Enter.
- You will find the currently installed version of Python If the command returns with the current version details, which means you’ve successfully installed it.
What is Selenium pip?
The Selenium package is used to automate web browser interaction from Python.
How to Install Selenium with Python
To install the Selenium bindings in our system, run the command: pip install selenium. As this is done, a folder called Selenium should be created within the Python folder.
pip install -U selenium
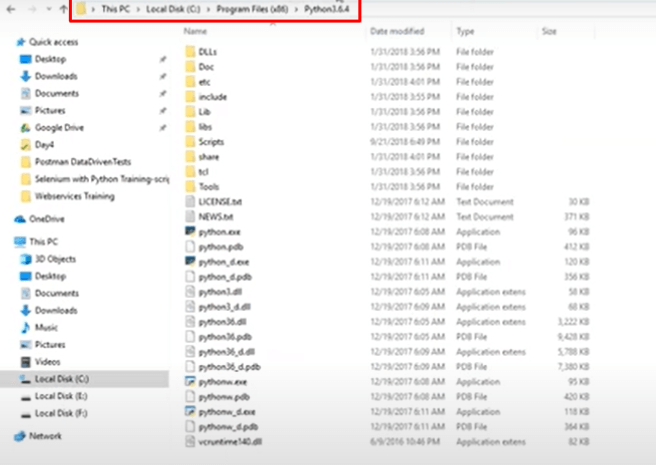
Open the command prompt (cmd) in the latest Python version which is installed here in the folder path
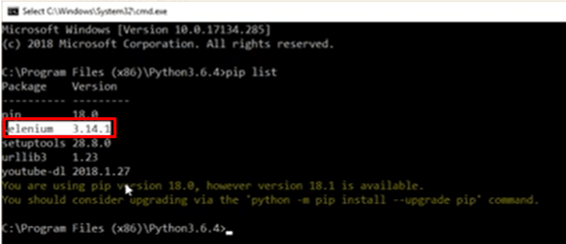
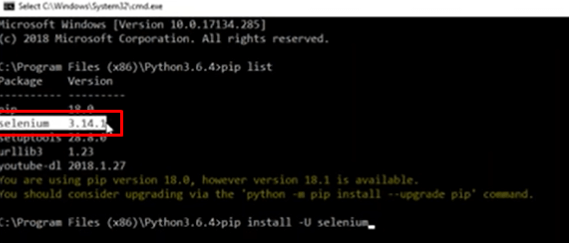
The command prompt will open; type “pip list” in the command line and press Enter to execute the command. This command will show you whatever libraries are installed with python.
Suppose it could not find selenium, so it means you don’t have selenium libraries. So it needs to install Selenium libraries. To install the Selenium library, type the following command in the command line pip install -U selenium and press enter to execute the command.
Once you execute this command, it will start downloading and installing all the Selenium libraries, which are required for Python.
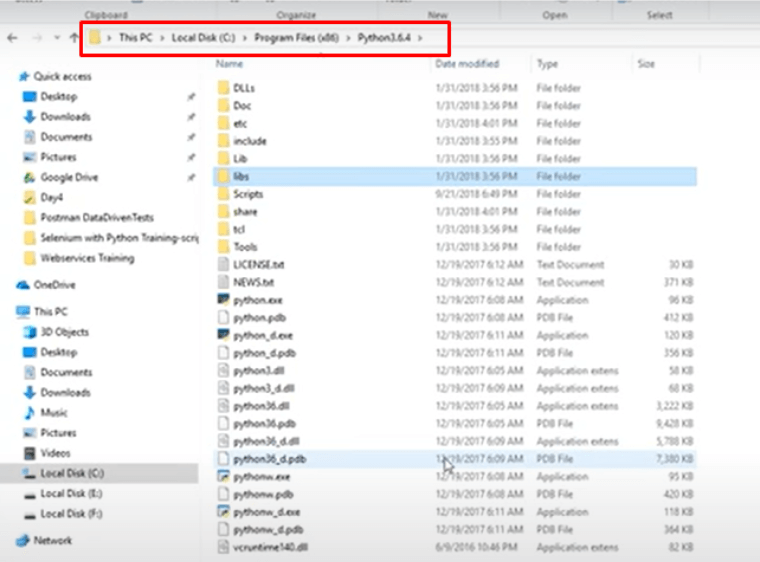
Once all the libraries are installed, all would be available in the Scripts as well as in the libs directory.
Now open the command prompt and type pip list in the command line and press enter to execute the command.
Now the command will show you the selenium library is installed
Now once you have installed the Plugin for Python, you can configure it into the Pycharm for the Automation tool.
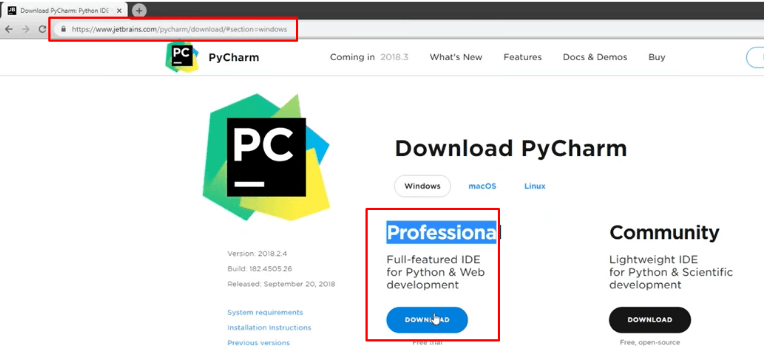
Download and install the PyCharm tool from Google. It’s just a simple exe file.
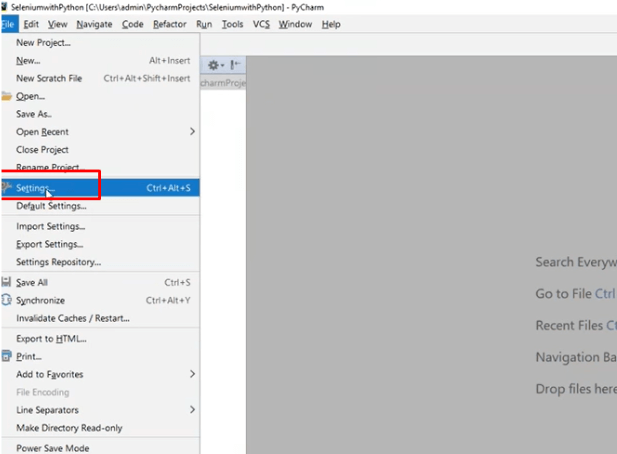
Steps to configure the Selenium with Pycharm
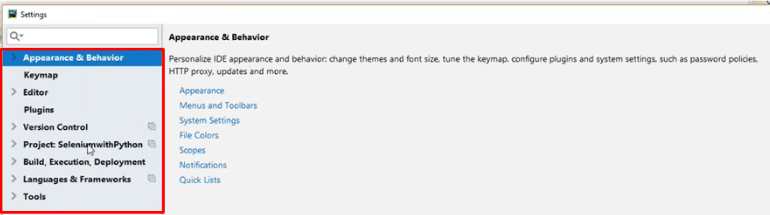
- Go to – File => Settings
- In the settings By default, you will find multiple options. See the example below
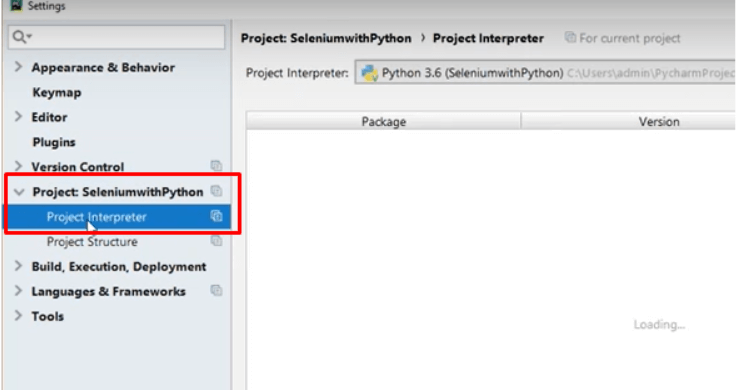
- You need to create the project and once the project is created then in this project go to the Project Interpreter or Python Interpreter. See the example below
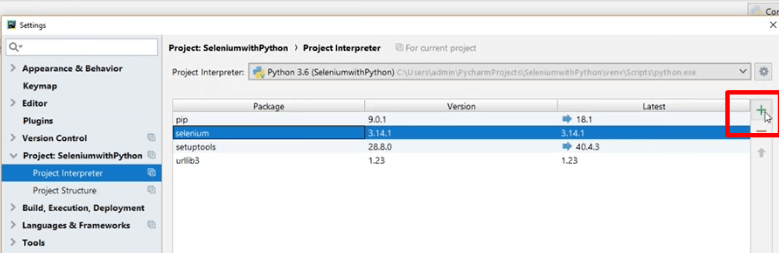
- On the selection of Project Interpreter, you will find the Selenium Plugin which is associated with the project and it will be shown on the right panel. See the example below

- If you don’t see the particular option, then you have to attach this option and for that, you have to click on the (+) button
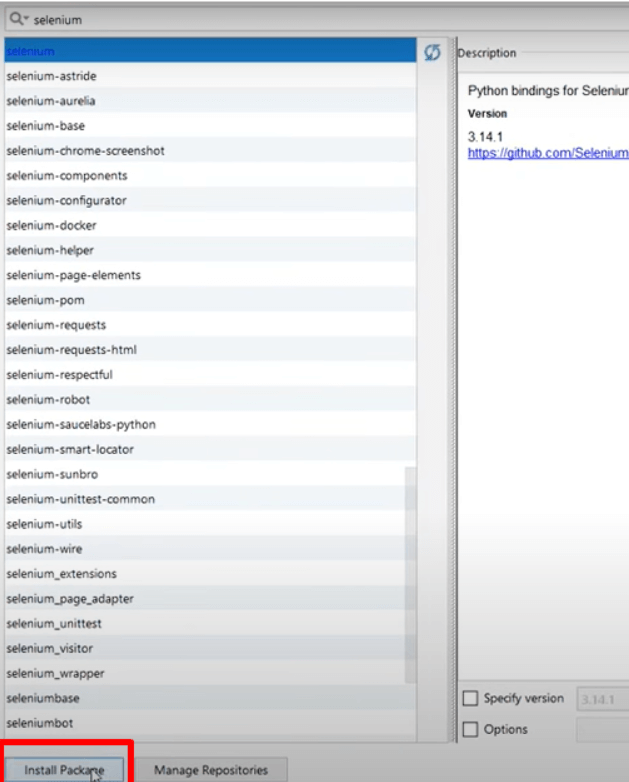
- Type the selenium, and you will get the selenium on the right panel. See the example below.
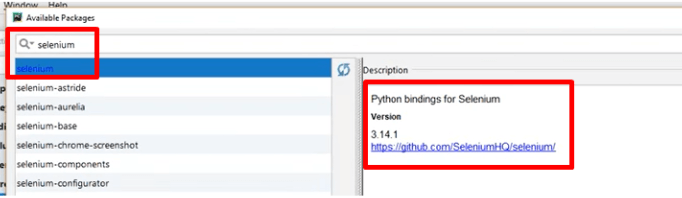
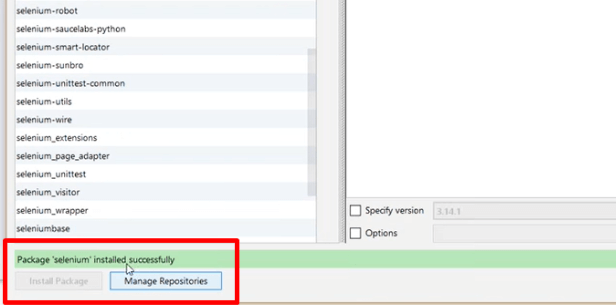
- Once you get the selenium as per above, Click on the ‘Install Package’ and then your selenium package will be installed with Pycharm
See the example below