Step 1: First, create a. It’s a repository, not a project. You need to create a project using the project Menu. I will move on to the project later. First, I am discussing creating issues.

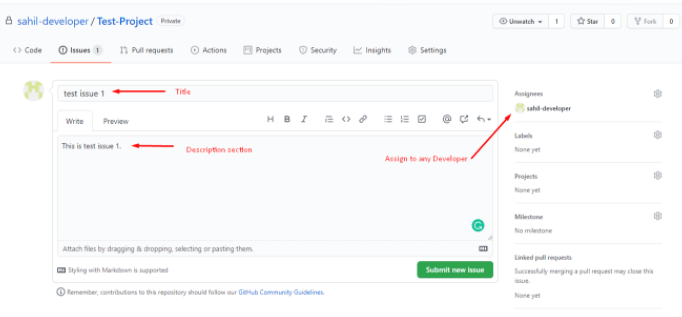
Step 2: Go to the Issues menu and click on the New Issue button.

As shown below, by using the right menu we can assign issues to any developer, project, Milestone.
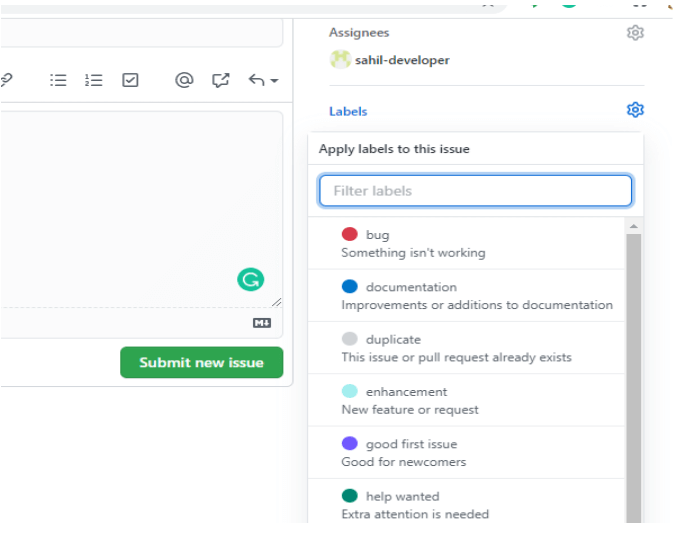
While creating issues, we can assign labels as given below or we can create custom labels.
Step 3: After submitting, In the issues menu we will get the listing of Issues.
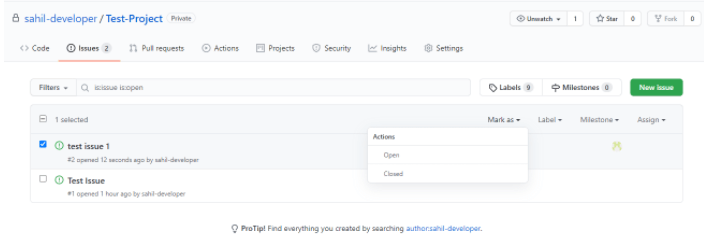
We can select a specific issue and mark it as open or close and we can change the assign
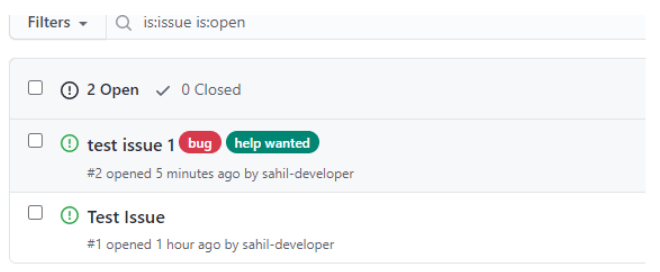
we can also assign labels from here like bug or help wanted etc.
Step 4: Apart from that we can also create a milestone in Github and move a specific issue under this.
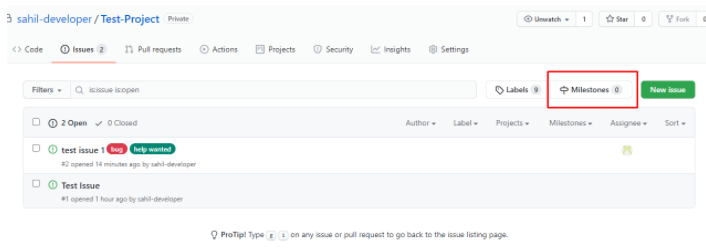
Click on Milestones under issues. After that click on the new milestone button.
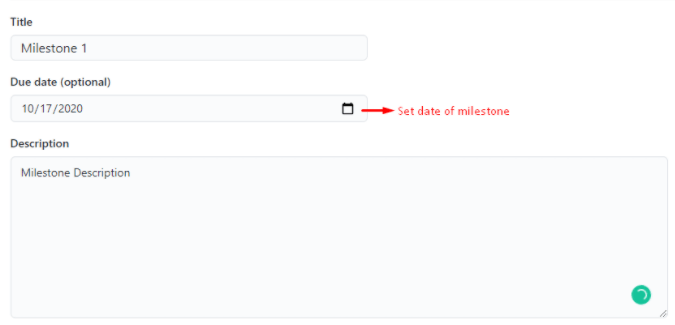
Milestone listing:
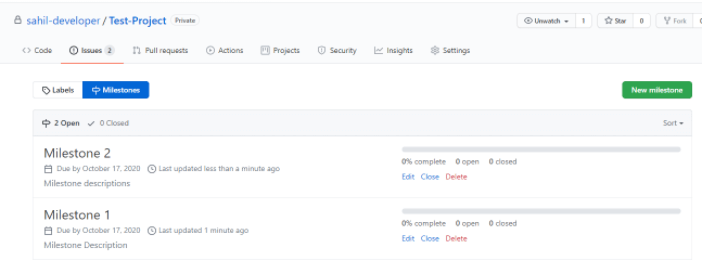
Two Milestones have been created. We can add issues to specific milestones. For example if I am assign both issues to Milestone 1 then it shows as below:

Milestones also show progress. For example, if one issue is resolved and one is pending then it shows progress in percentage.

That’s all about the issues.
Now I will discuss the Project. To Create a new project. Click on the project menu and click a new project.
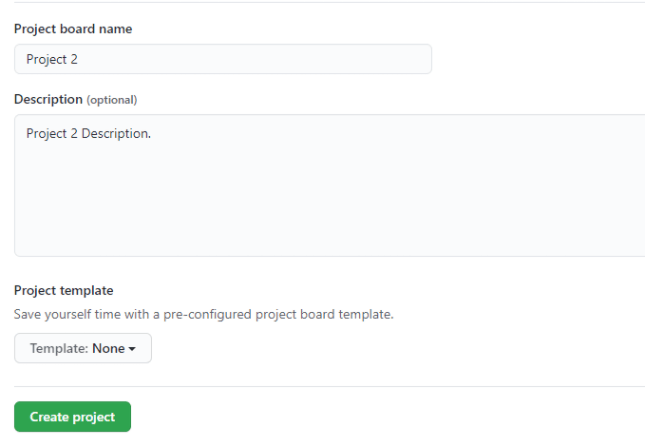
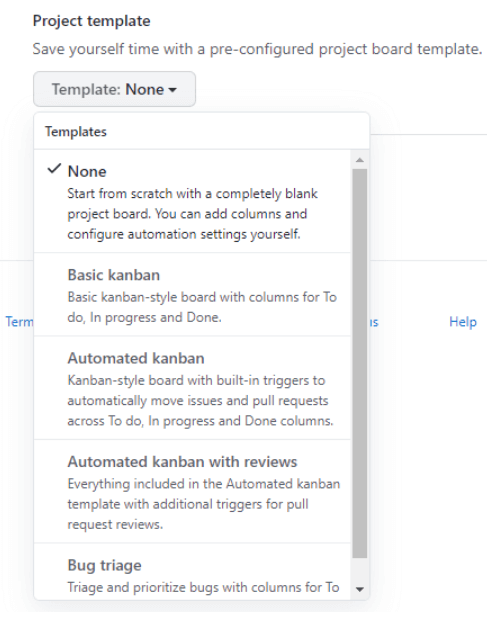
We can set templates as per our requirements for managing tasks. For example, We want to manage tasks like To do, In progress, Done. So we can use the Basic kanban template while creating a project
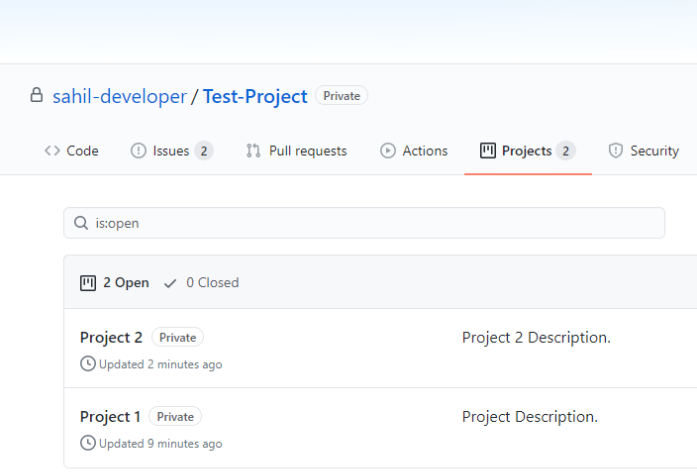
After creating projects, you can see project listings as shown below.
If I open Project 2 then it shows as:
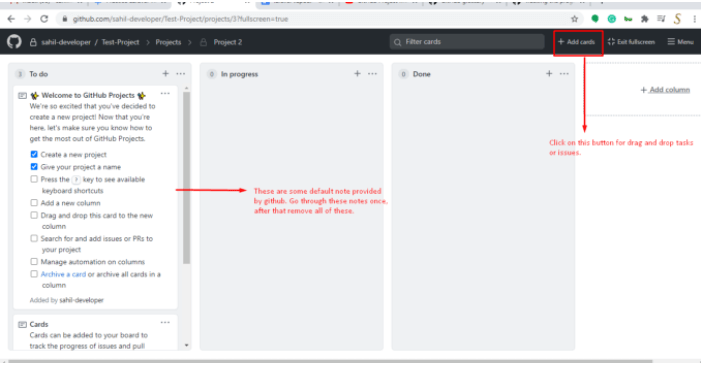
On click on Add cards, we will get a List of issues.
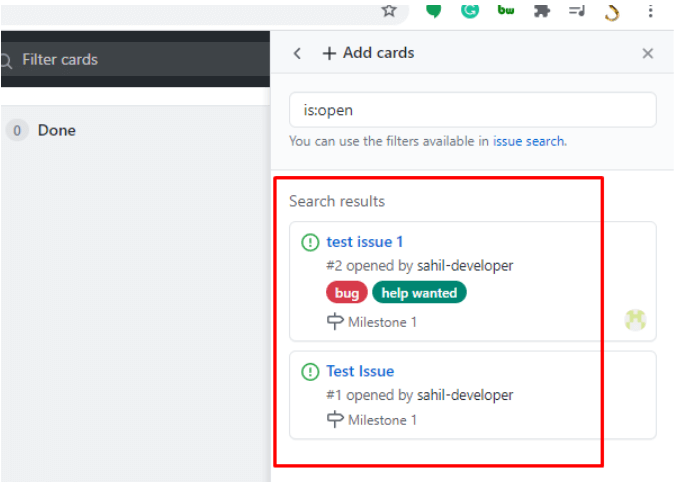
we can drag or drop issues to specific cards.
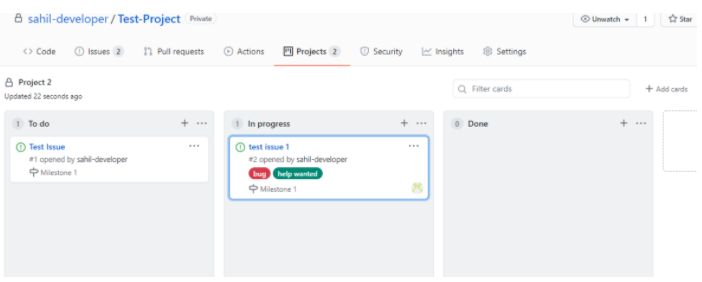
One more thing instead of To Do, In Progress or Done we can also create some more columns like testing, etc as per our requirement.
The above-shown template is just a template. If any issue gets resolved then it will not automatically move to the Done column.
For automatic task management, we need to manage Automation.
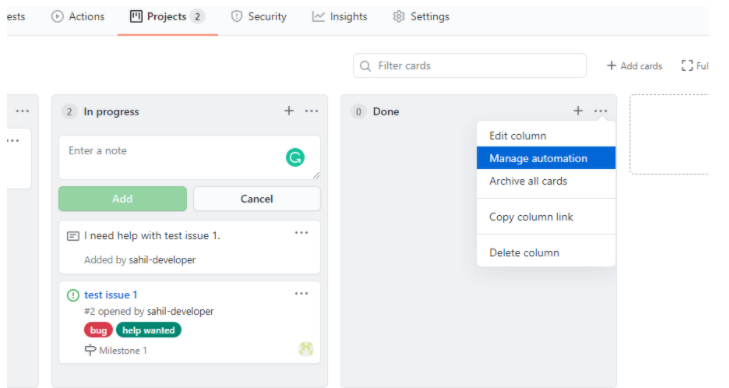
If you check the closed checkbox then the task automatically moves to done.
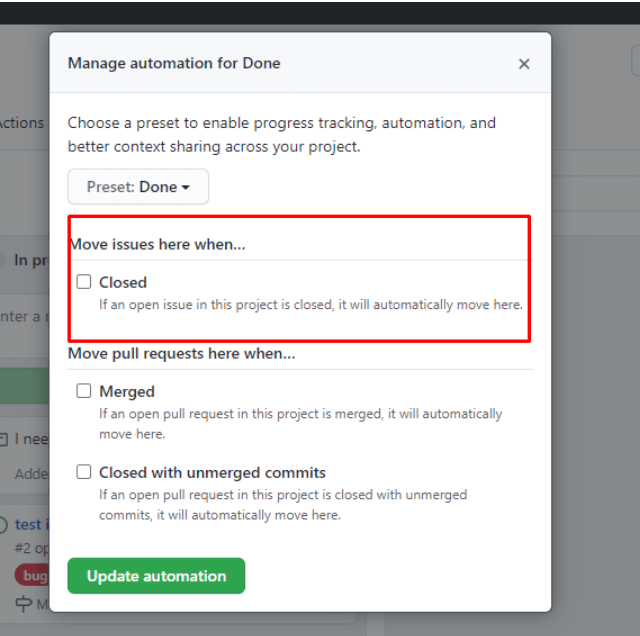
Similarly you can manage for In-progress, To-do also.
Apart from that, you can also add notes in columns.
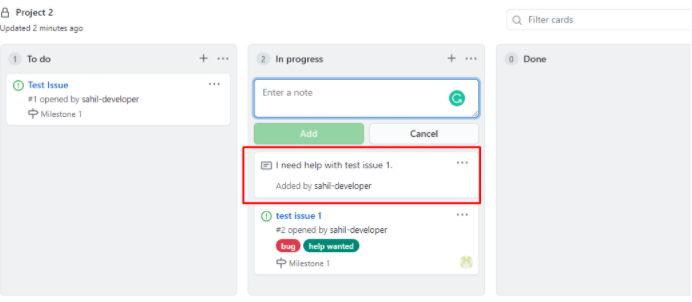
You can also convert notes to an issue as shown below:
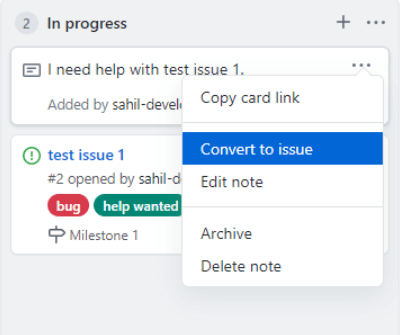
After that you can convert it into an issue you can assign it to anyone.
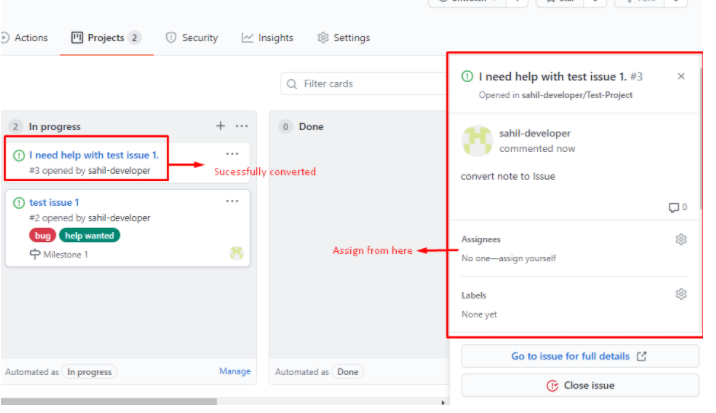
Now issues are used to manage tasks. There is not a logical relationship between the issue and the branch. We can not directly push our changes to the master branch.
So the only way is to create a new branch from the master with the same issue number/name.
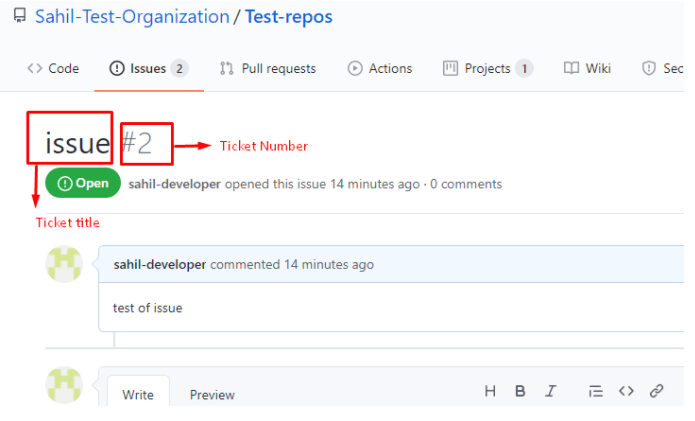
So if you are working on issue 2 then create a new branch with the name “issue 2” and commit your code into this branch.
For creating a branch first checkout from the master branch using the command
- git clone -b master “clone URL” // clone project from the master branch
- git branch “new_branch” //create a new branch
- Git checkout ‘“new branch” //switch to the new branch
For commit code, your code
- git add “file Name” //add files for commit or you can commit all files using *
- git commit -m “commit message” //code commit successfully in local.
- git push origin new_branch //code successfully pushed on server
Apart from that, you can use Visual Studio or any other editor that provides GUI for creating branches git pull-push.
After that, you need to create a pull request for merging the “issue 2” branch with “Master”.
For creating a new pull request click on the “New pull request button” under the pull requests menu.

Select the base branch and compare branch, after that click on create a pull request.

Enter a description of the pull request, also add the assignees, projects. And you can create pull requests.
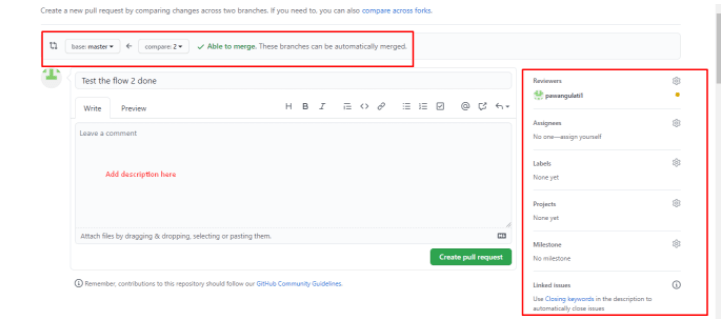
After approving the pull request your code will be merged into the master branch and after that, you need to close the issue.
