Learn the Steps to Upload and Distribute iOS Build through Testflight
Testflight is a feature provided by apple to test the application by a group of users. In this we can send invitation to the users. It makes easy to invite users to test your ios app before uploading it to the app store.
Steps:
To upload the build to testflight, first you need to make the distribution profile for application from apple developer account.
1.) Click Log In, choose Select Certificates, Identifiers & Profiles.
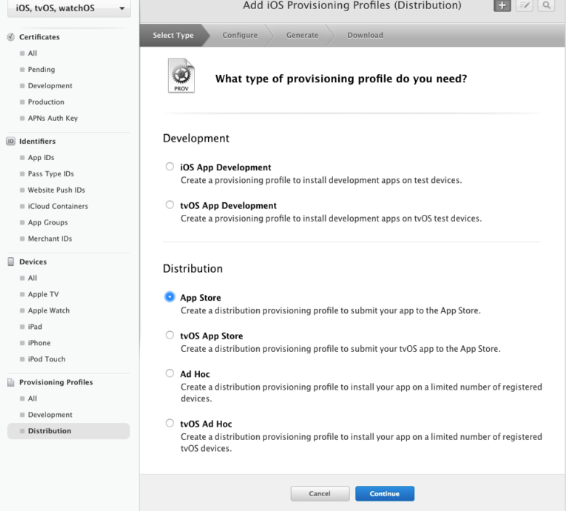
2. )In the left tab under Provisioning Profiles tab, select Distribution
1. Click add button “+” at the top right to create a new profile
2. Choose “App Store” and press Continue
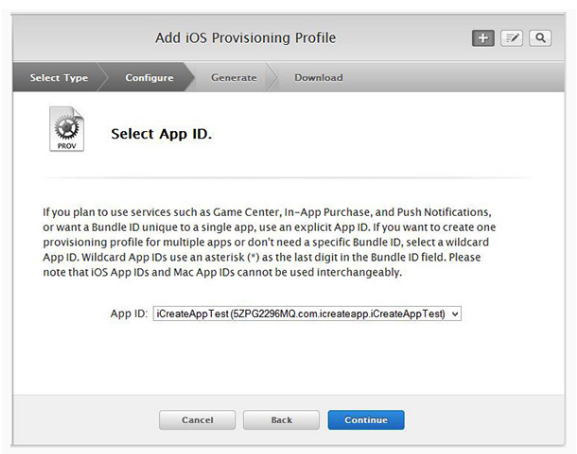
3. Choose App ID and press Continue
4. Select the Certificate you wish to include in this provisioning profile and click Continue. Next, select the devices you want to include in the provisioning profile.
5. Create a name for your profile and then click Generate. You have to include “Distribution” in the name so that you can distinguish this one from testing(development).
3)
1. Download your provisioning profile to your mac system.
2. Double click the provisioning profile which is downloaded to install it into the keychain access.
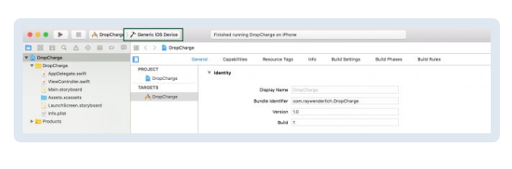
4) Now open your project in xcode. Make sure your your bundle identifier and team id and code signing are properly set. Add your version no. of the app and build number. Choose Generic iOS Device in the scheme chooser:
Note: You can’t add same build number and version number every time when you upload the build to the app store. Version could be same but you can to increment the build number by one. Suppose you are uploading 1.0 (1) where 1.0 is version and 1 is the build number . Next time you can upload 1.0(2) not 1.0(1).
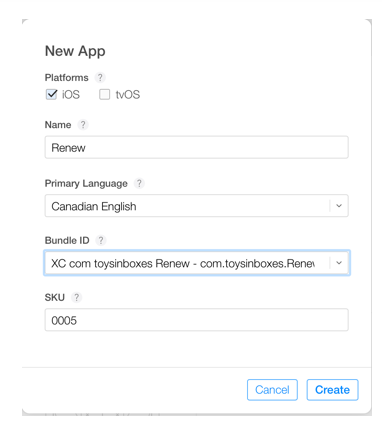
5) Now that you have a bundle ID, go to http://itunesconnect.apple.com/ and register your App.
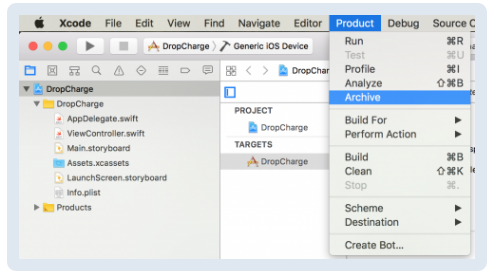
6) Then choose Product > Archive from XCODE to upload the ipa to the appstore:
7) If everything is okay with the build, Xcode will open the Organizer window with the app in the Archives tab. Click Distribute your app.
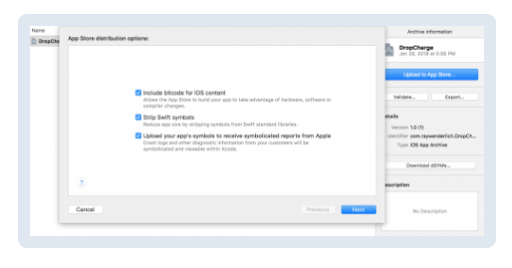
Xcode will prompt you with App Store distribution options. Xcode selects all the checkboxes by default. Leave them as it is and click Next:
The next screen will ask you for distribution signing options. You can choose automatic signing, or manually. Select your distribution certificate and provisioning profile. Select related profile, and click Next.
8) Once Xcode finishes its processing , it presents a summary page for the app which you’re about to submit. Click Upload.
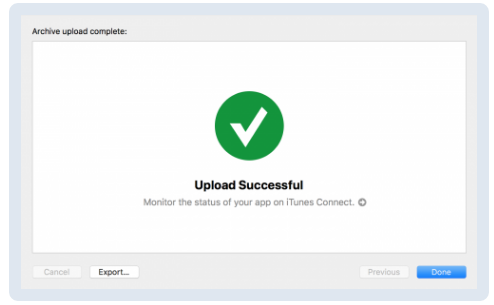
Your app will start uploading to iTunes Connect. Xcode will displays different messages as it compiles, verifies and signs your app. When the upload finishes, you will see the following message in the dialog box:
Click Done.
9) Now open app store connect and click on the app you created. After 15-20 minutes your app will be displayed in the app store which you have just uploaded if it does not contain an error. You can check the activity of the app from activity tab.
Till then you can add your basic app information and app icon(1024x1024px).
Now, our build is on iTunes Connect. We need to set up Internal and/or External TestFlight Testing.
Internal tester: Submitting the build for Internal testing involves adding anyone from your iTunes Connect team as internal testers for the app. Up to 25 people can be added as Internal Testers.
External tester: This is any user outside of your team that wants to test your app.You can add up to 10,000 external testers.
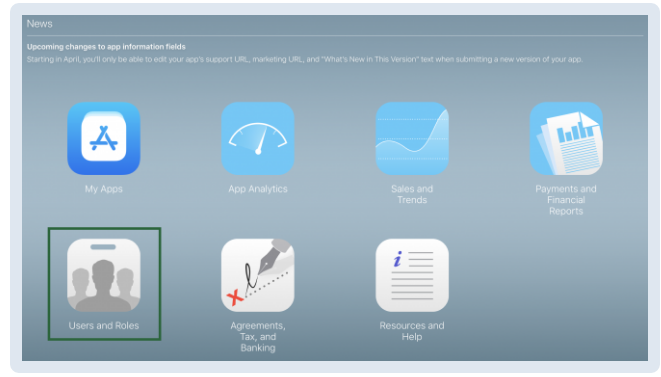
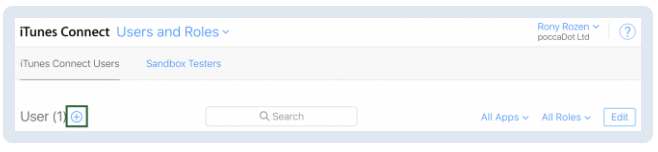
To add an internal tester, Click to the Users and Roles section in iTunes Connect:
Click the + button to add a new user:
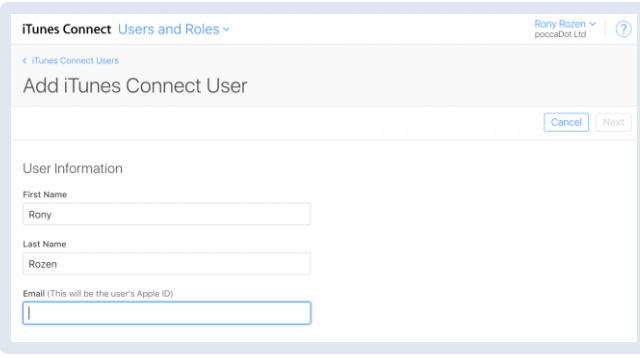
Fill your new user information, using an email address you have access to, and click Next:
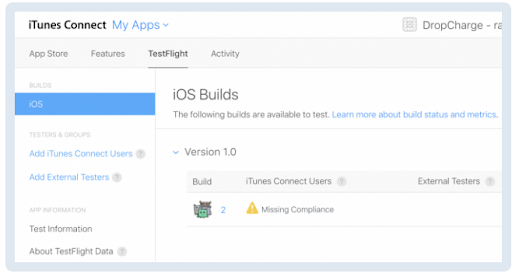
10) Now open my apps option from itunes and click on the testflight tab.You may notice a yellow warning sign next to the build you’d like to send internal testers. If this is the case, click the warning sign and complete the required steps.
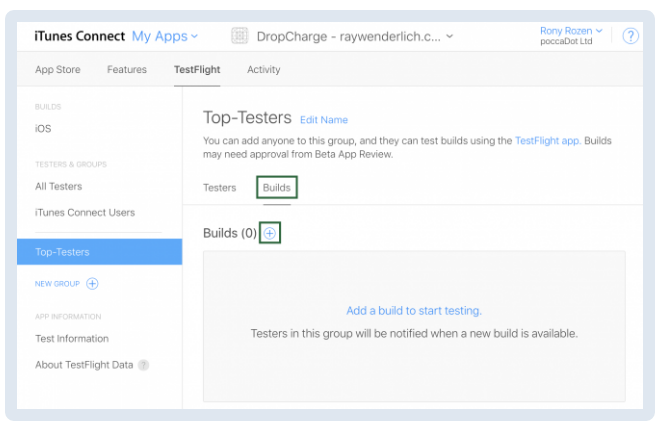
Now click on the add iTunes connect users in which you can see your internal testers list. By clicking on the add button , internal testers will receive an email regarding the testflight build.
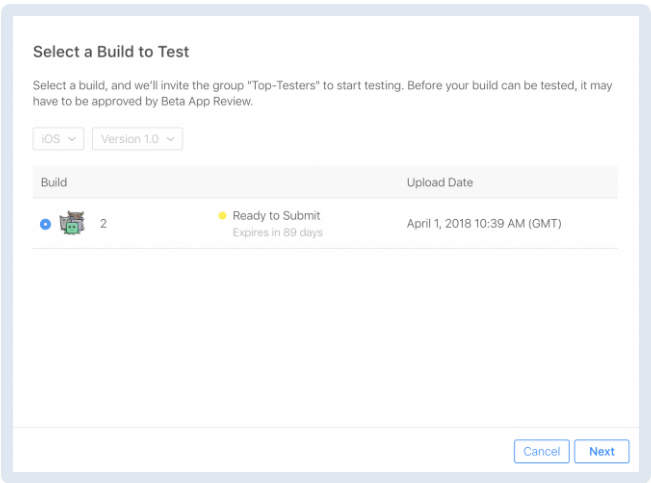
11) You can also add your external testers from Add External Testers tab. After adding the external testers you need to select the build for the external testers. By clicking on the build tab you can add build you may want to test from your external testers.
Click Next button.
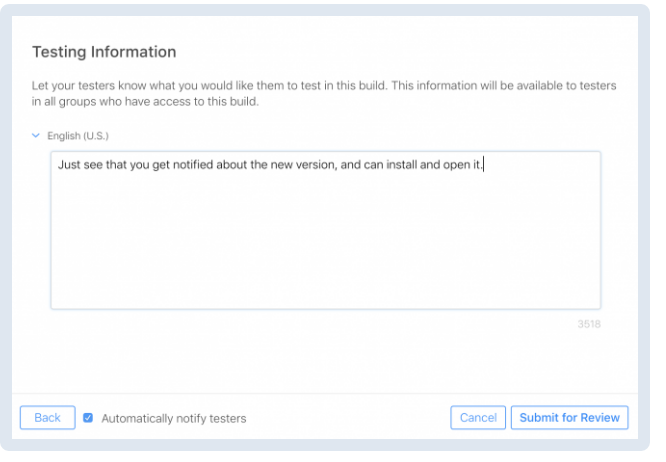
Click next and add the information you want from testers to test in your app. Click on submit and Review. Now the testers will receive a notification to install the app.
Thanks a lot for the article. I think Firebase just changed the game with Firebase App Distribution recently.