Introduction to Salesforce Community Cloud and Steps to create and customize it
Communities are like portals or support sites for connecting important people. Communities improve engagement with your Customers, Partners, and Employees.
You can create multiple communities inside your salesforce org for different type of needs. You can integrate data from third party providers. Data from your community lives in your Salesforce org, and data living in your Salesforce org can be shared externally with your community. A community built using the Community Cloud provides a window into your Salesforce world.
Partner Community Licenses were created to allow engagement with partners, to allow you to access Leads and Opportunities. Customer Communities licenses allow you to engage with customers, on things like support cases and account administration.
Previously customer portals were used for providing support service to the salesforce customers. Nowadays customer portals do not exist within salesforce platform. Instead communities provide a similar support system as customer portals did. We can create communities for our customers, partners, and employees depending on licenses available.
Implementing the Community
Here are the steps to create a community inside salesforce platform and how to assign the customer user to the created community:
Create a new Salesforce customer community:
1. Go to quick find box and type Communities Settings.
2. Click on Communities Settings.
3. Click edit and enable communities.
4. Select a domain name to use for your communities, then click Check Availability to make sure it’s not already being used.
5. Click save.
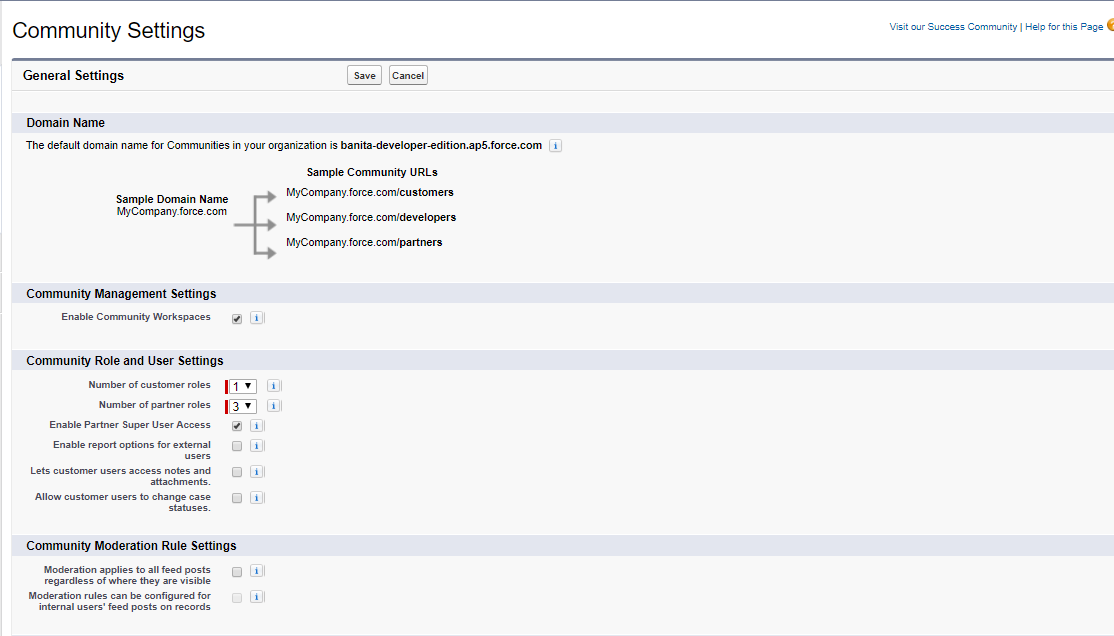
Update Org-Wide Community Settings
1. Go to quick find box and type Communities Settings.
2. Click on Communities Settings.
3. Select the desired settings and click save.
Create a Customer User for your community
1. Create a contact if not already created and save the contact.
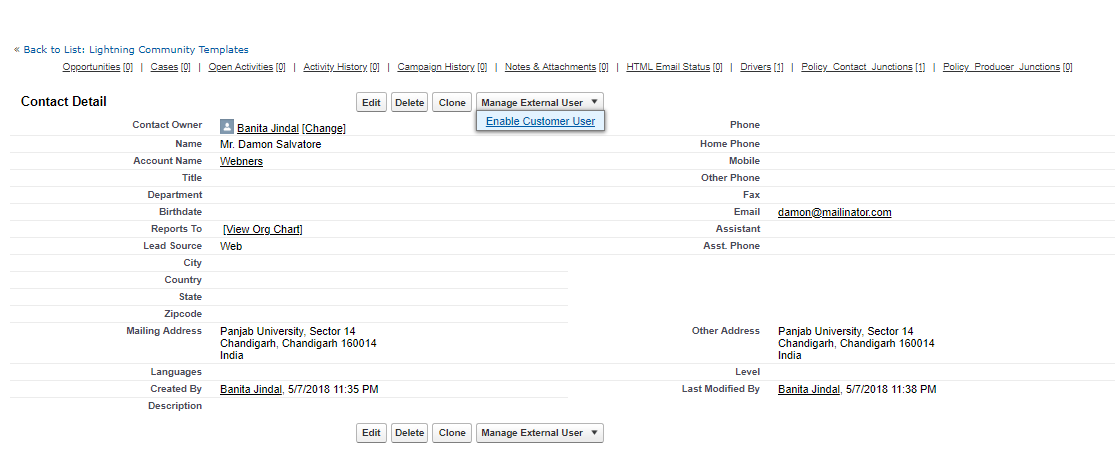
2. Now open the contact that you want to assign to this community portal.
3. Click on the manage “Manage external user” button and select Enable Customer User
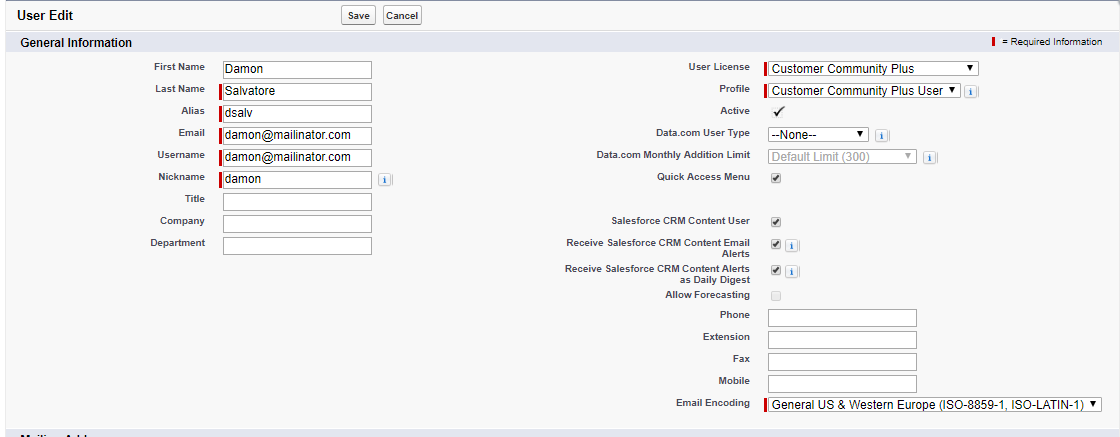
4. Assign User license and Profile. Profiles give users access to tabs in your community, so be sure that you choose a profile that has the appropriate tabs exposed.
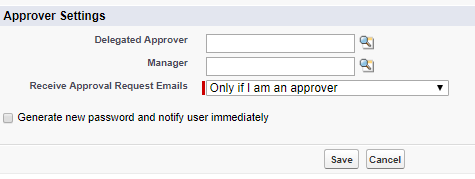
5. Deselect Generate new password and notify user immediately so that users don’t receive a password before the community is activated. When you will activate the community, user will receive the Welcome mail with his username and Password. Click Save.
Now, We can create a new community:
1. Go to the All communities setup and click on the new button

2. Now, community wizard will open and various templates will be shown
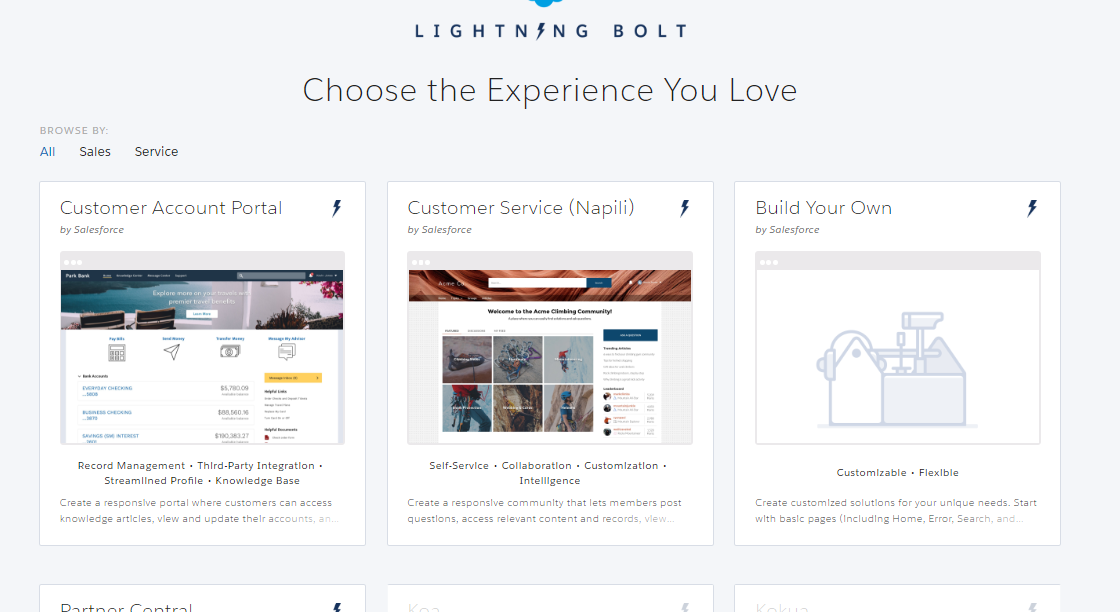
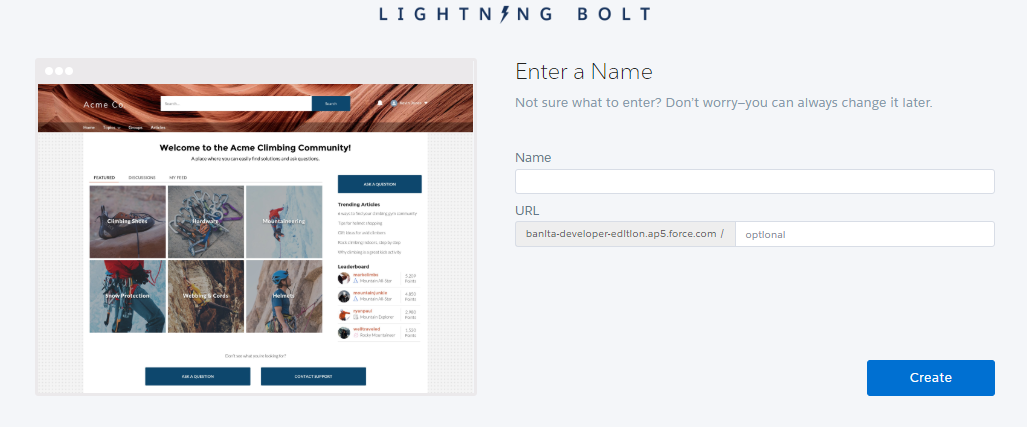
3. Choose appropriate template according to your requirement and click on Get Started button. Next screen will ask you for your community name (Demo Customer Portal) and community url.
4. Click on create and your community will be created in few seconds and you will see the following preview
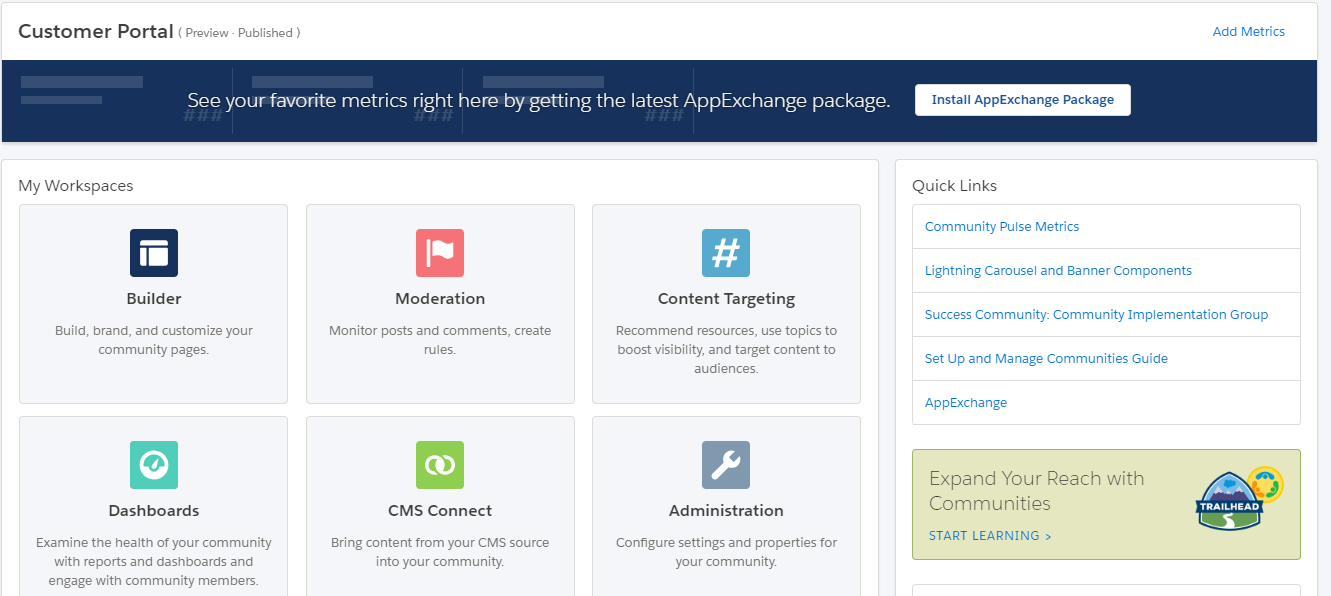
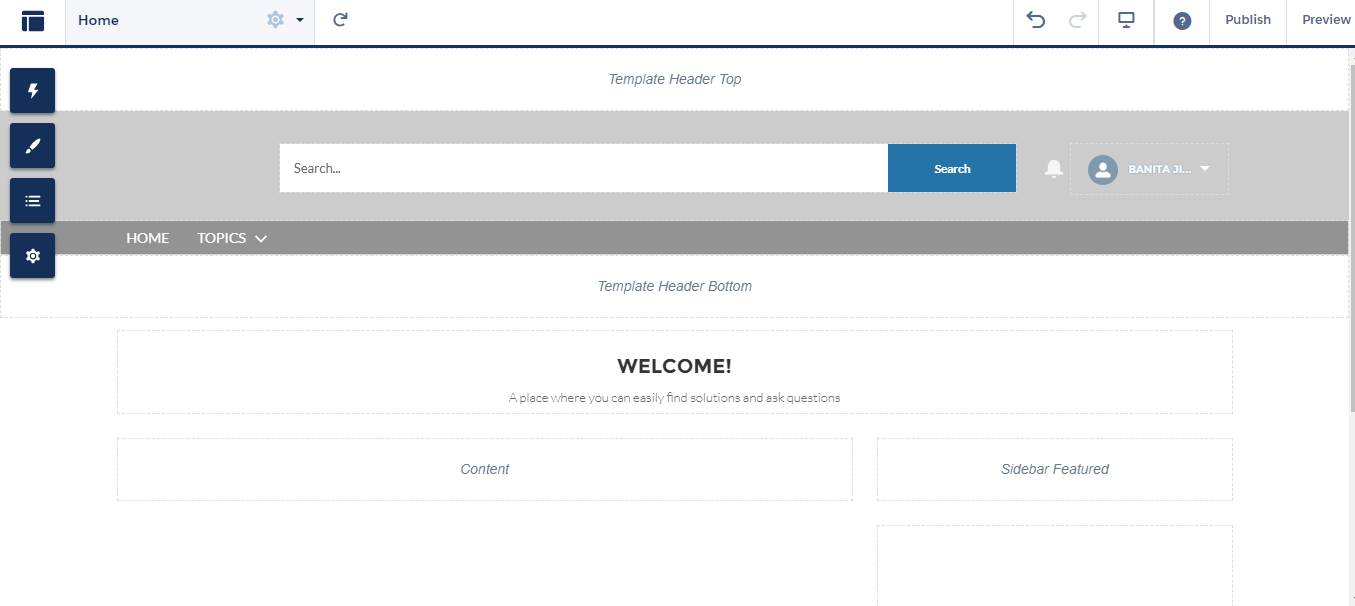
You can create your own community layout by selecting Builder component from the workspaces. Following default view of your community will be shown.
Customize your community:
1. You can create different components on this page by clicking on the lightning component icon as shown below.
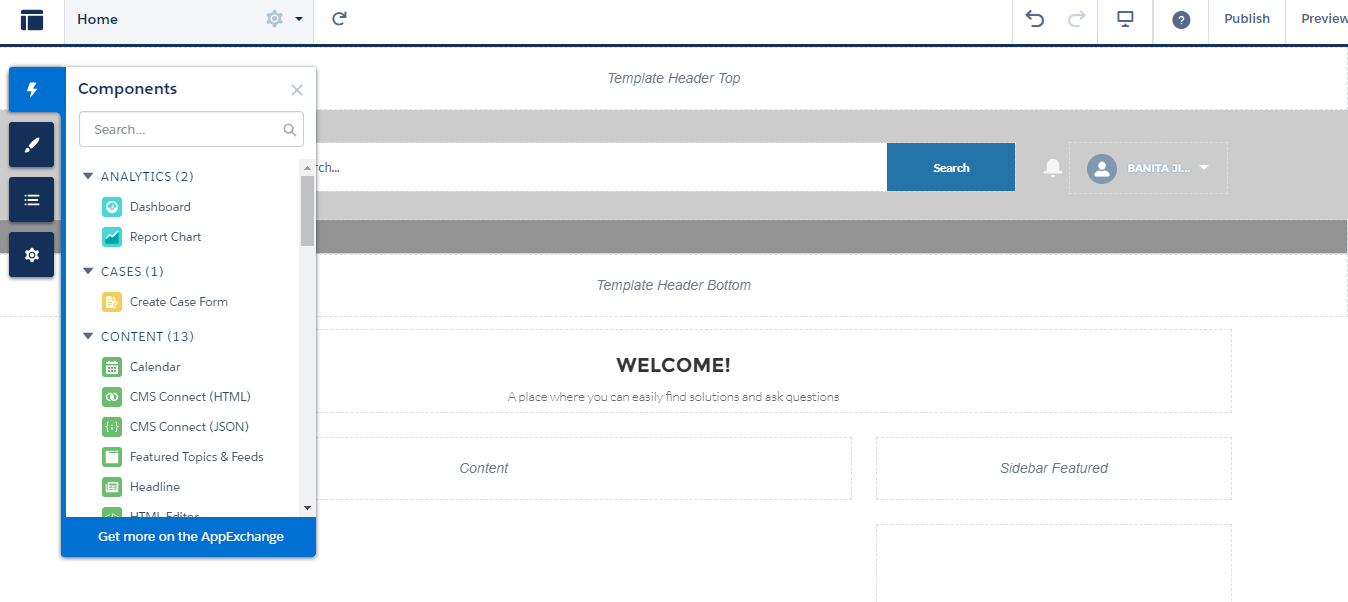
2. Builder is for creating the custom components for your community. Different settings and color themes are available in the builder for customization of your community.
3. You can update the basic settings like Name, Login info, email templates, tabs and pages etc from Administration link of your community management.
4. Click on left most corner icon either in your community preview page or from community builder and select administration link from the dropdown.
Now, you can do multiple settings according to your requirement.
Add Tabs to Your Community
1. Click on left most corner icon either in your community preview page or from community builder and select administration link from the dropdown.
2. Select the tabs settings. If tabs are not visible then click on preferences and then select Show all settings in Community and click Save. Refresh the Page. Now you can see the tabs settings.

3. Select the tabs from available tabs that you want to display in your community. Click Save.
Change the Branding to Your Community
1. Click on left most corner icon either in your community preview page or from community builder and select administration link from the dropdown.
2. Select the branding settings. Select the appropriate colors and click Save.
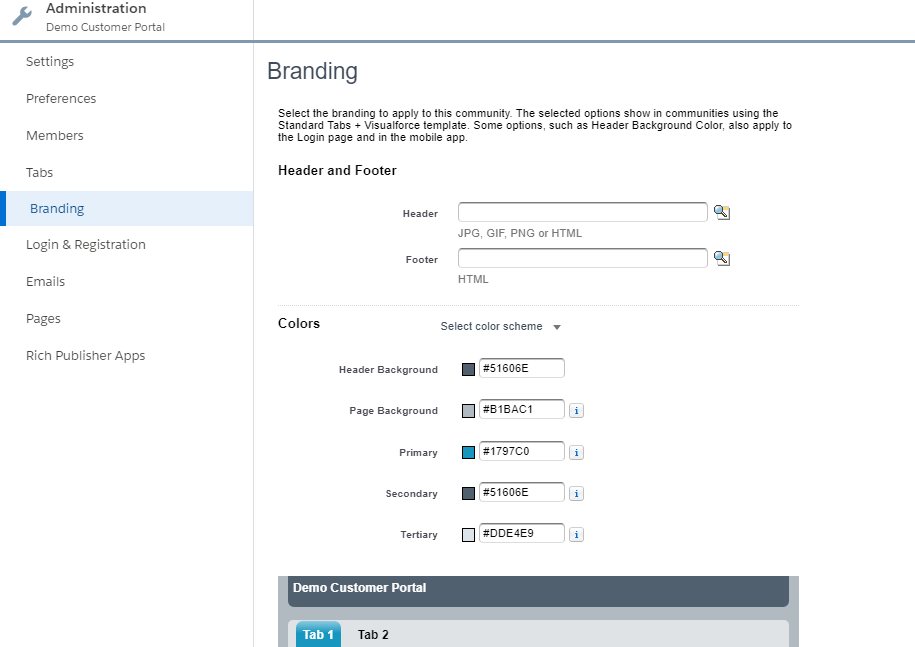
You can change many other settings like selecting the email templates for your community, Login page logo etc.
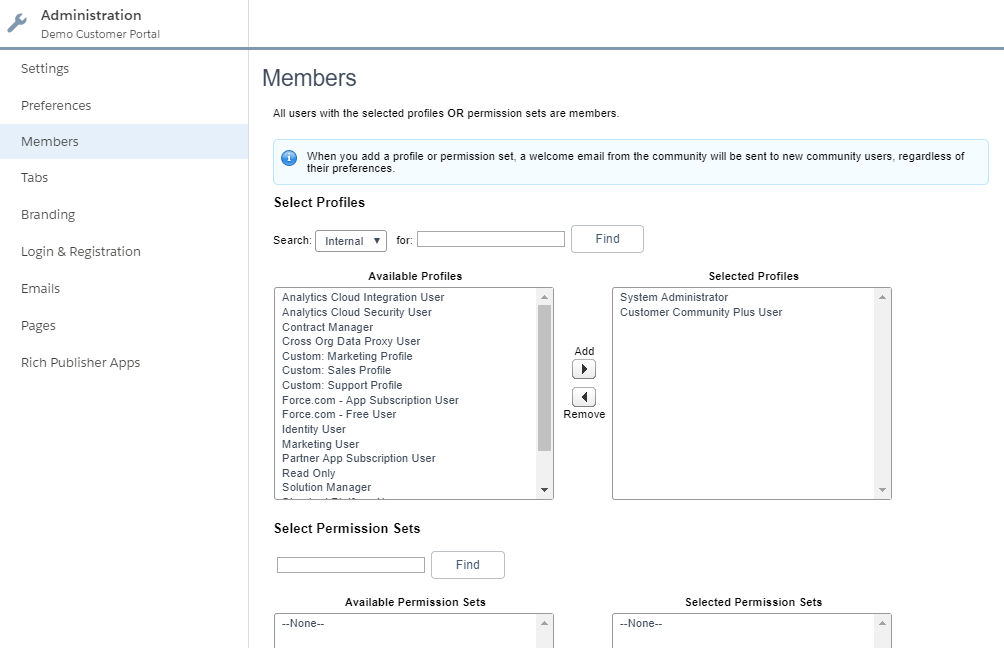
Add Members to Your Community
1. You need to add the members who can access your community. You can add members either by using Profiles or Permissions sets.
2. Click on left most corner icon either in your community preview page or from community builder and select administration link from the dropdown.
3. Select the Members settings. Add the appropriate user profiles or permission sets and click Save.
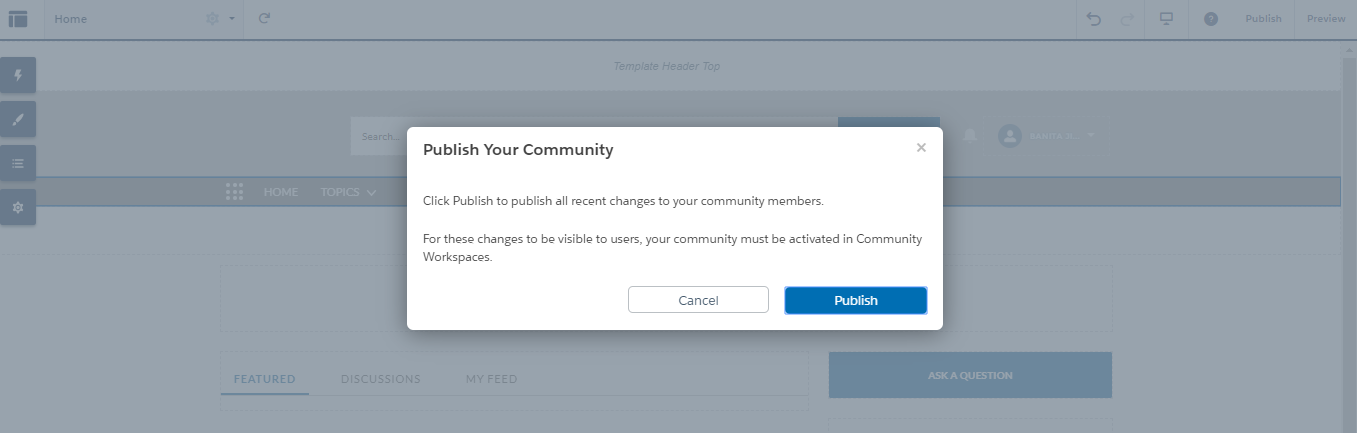
Publish Your Community
1. All the changes made in the Administration settings need you to publish your community so that changes will be reflected to all your community members.
2. Go to Community workplaces and click on builder. At the Top right corner, there is the option to publish and click the publish.
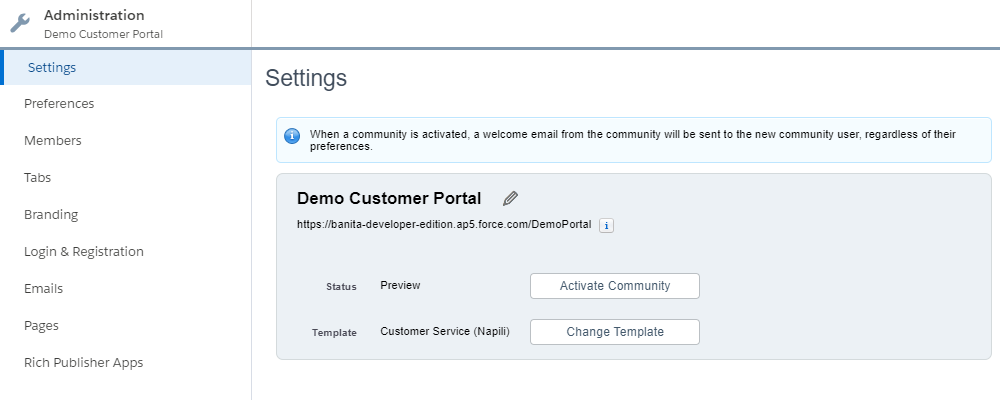
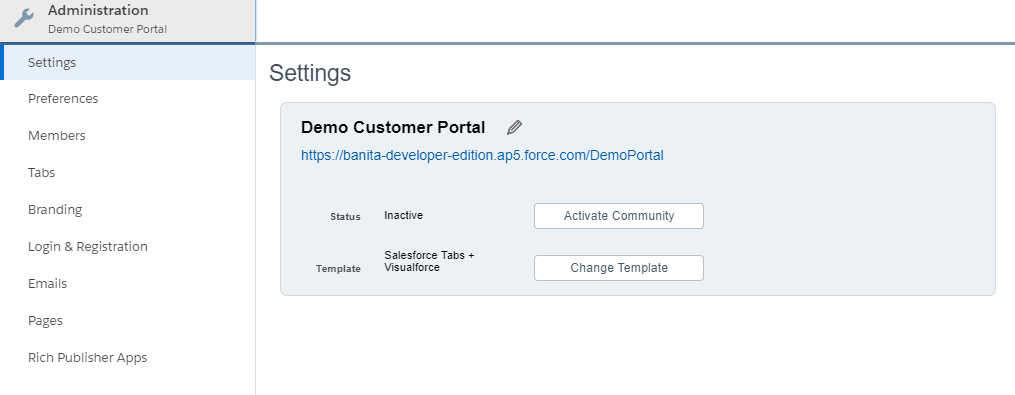
Activate your Community
1. Now, you need to activate your community so that welcome email will be sent to the members of the community.
2. Click on left most corner icon either in your community preview page or from community builder and select administration link from the dropdown.
3. Select the settings tab. Click on Activate link.
User can access the community by their username and password received in the welcome email.
Different features will be available in different community templates. I have created this community using Customer Service (Napili) template. User will see the general view showing in your community Builder. User will not be able to see the tabs. Saved tabs from Tabs will only be visible under Salesforce tabs+visualforce template. So, you need to create the community using that template to show the tabs view. You can also change your template. Also, In other templates, you can show the tabs but you need to create the tabs and their pages using builder as explained in above steps, you can not show tabs directly using Administration > tabs feature.
Change Your Community Template
1. Click on left most corner icon either in your community preview page or from community builder and select administration link from the dropdown.
2. Select the settings tab. Click on Change Template link. Then set the required field and click create.

Now, User can login with their username and password and will be able to see the following view of their community
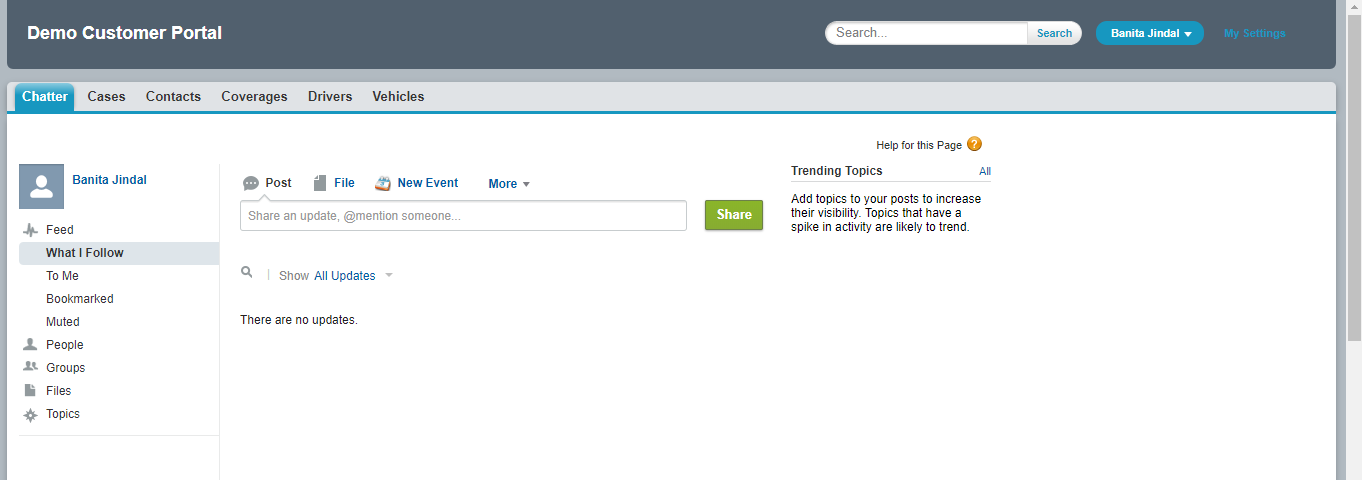
What users can see in your community depends on your settings and permissions sets. You need to set the appropriate permissions and settings for different community member depending on which kind of data should be visible to which users inside your community.
2 comments