Push Notification
A push notification is a message that pops up on a mobile device to notify a user that a specific action has occurred in that mobile app.
Below are the steps to configure Firebase in your application (To continue with these steps, you should already have a Firebase account) –
1. Create a Firebase project:
- Go to Firebase console.
- Click on Add project as shown below:
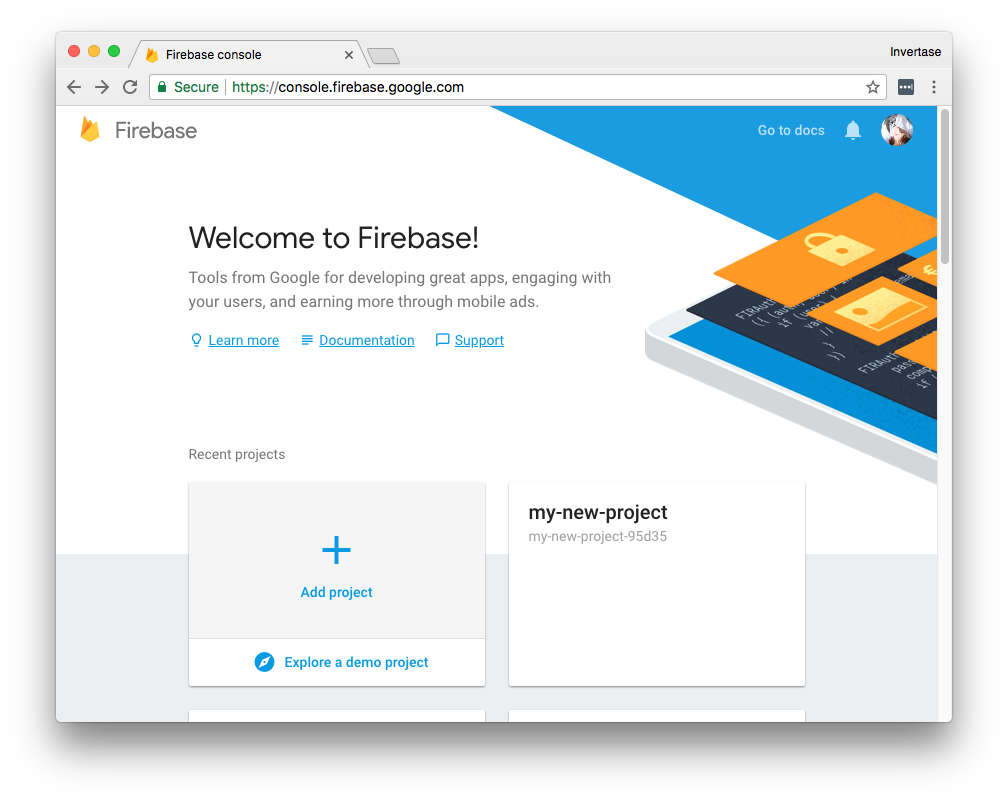
- After this, you will be redirected to a new screen where you will need to enter a new project name.

- Enable/disable Google analytics for your project according to your needs. And click on the Create Project button.
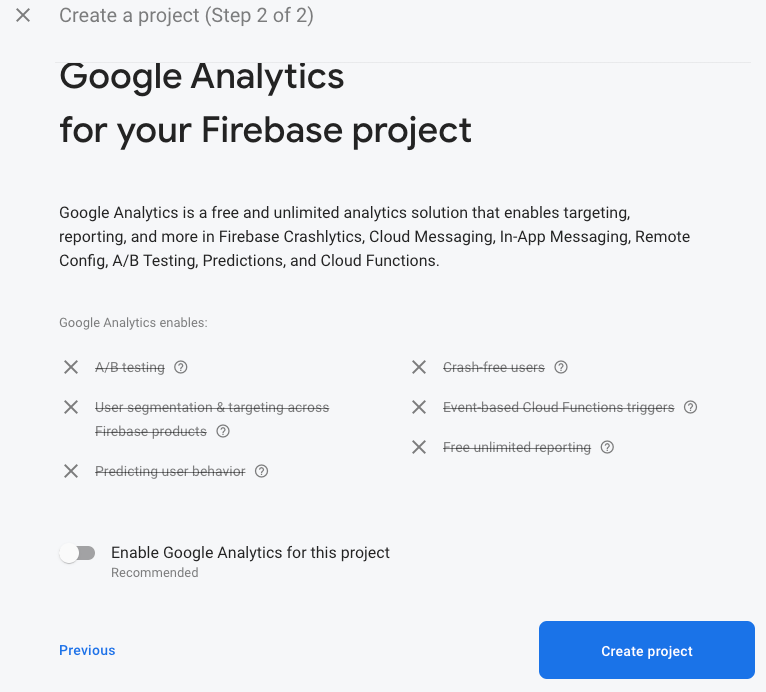
- After that, click on the Continue button.
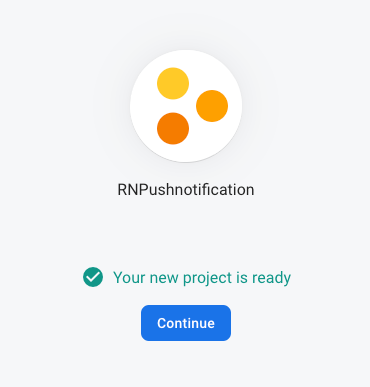
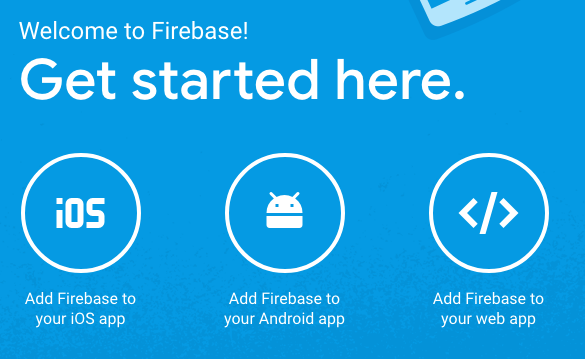
- Once your project has been successfully created, you’ll be redirected to the project homepage. Click on the IOS circle to add firebase to your IOS app.
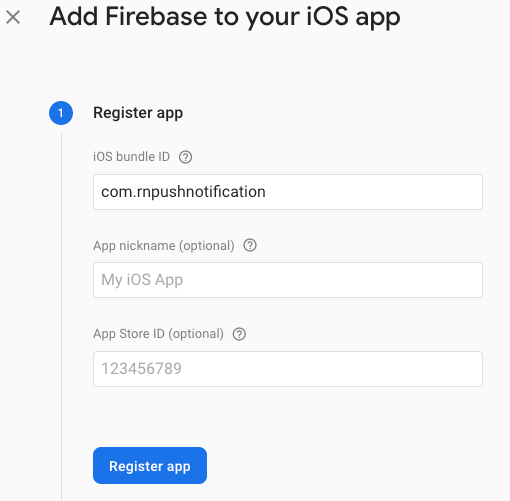
- Enter your project bundle id and click on the Register app button.
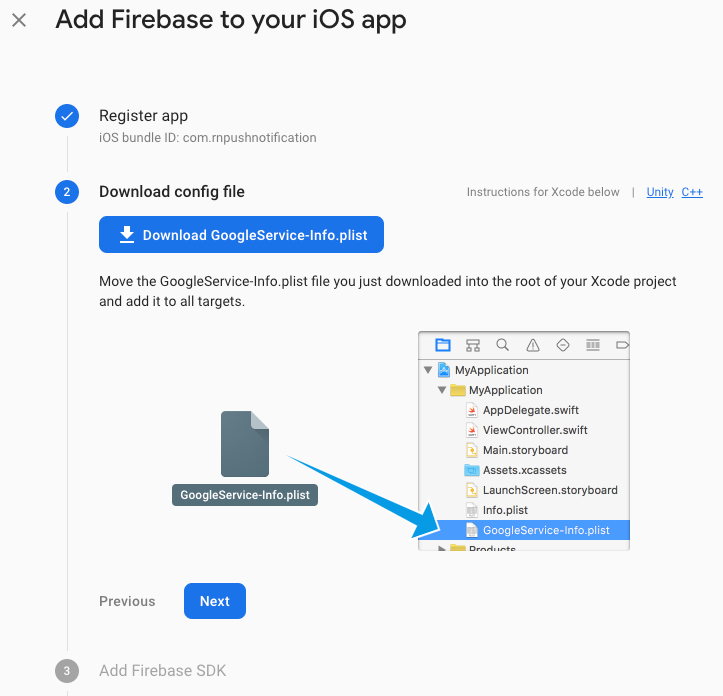
- Download the GoogleService-info.plist file and add this file to your project.
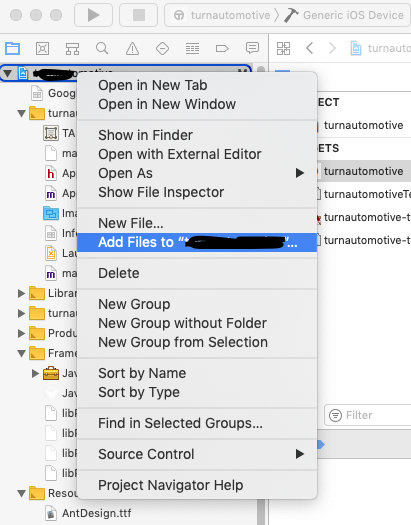
- Open your project in xcode. Right-click on your project and click on Add files to “YOUR PROJECT NAME”. Select GoogleService-info.plist file and click ok.
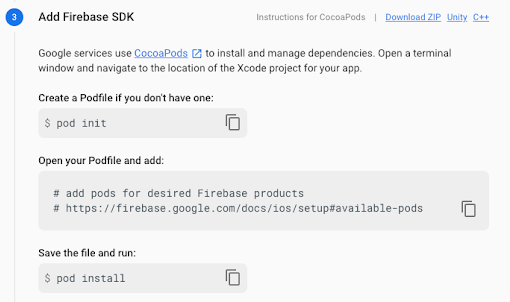
- Open your project’s pod file and paste the below text and save it. Run “pod install” command.
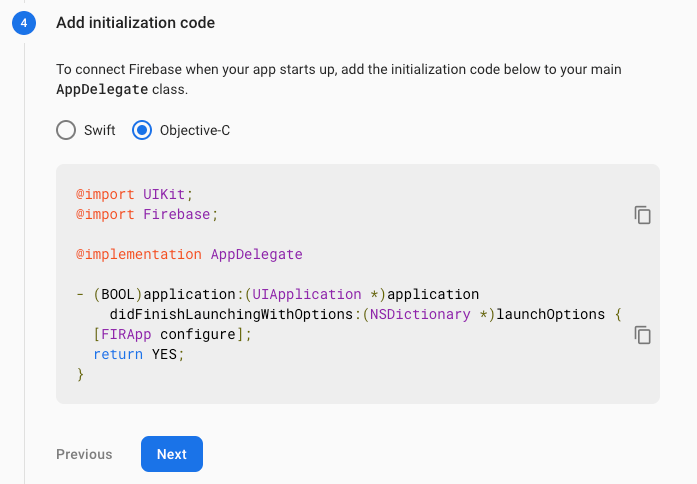
- Open AppDelegate.m file and paste the below content in it. And click on the Next button.
- At last, verify the installation and hit the Continue to Console button.
2. Generate APNS Authentication Key for iOS Push Notifications:
In Firebase console, you have to include APNs Authentication Key in Project Settings > Cloud Messaging in order to receive push notifications.
For this, Go to the apple developer account and click Certificates, Identifiers and Profiles.
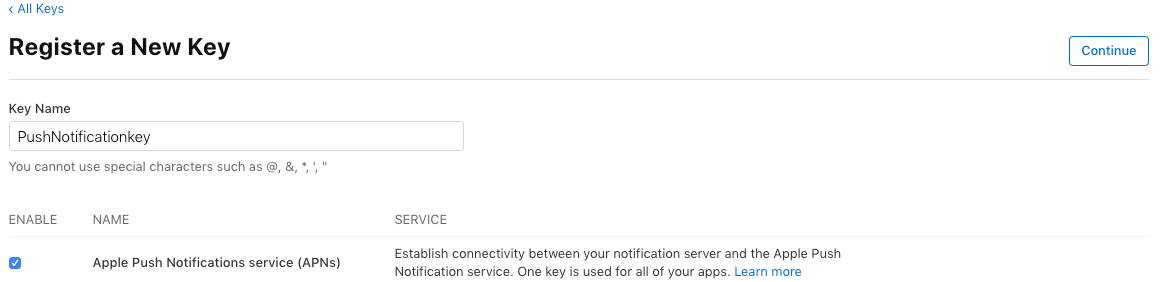
Add a new Key.
Enter a key name and enable “Apple Push Notifications service (APNs)” service. After that Hit the continue button.
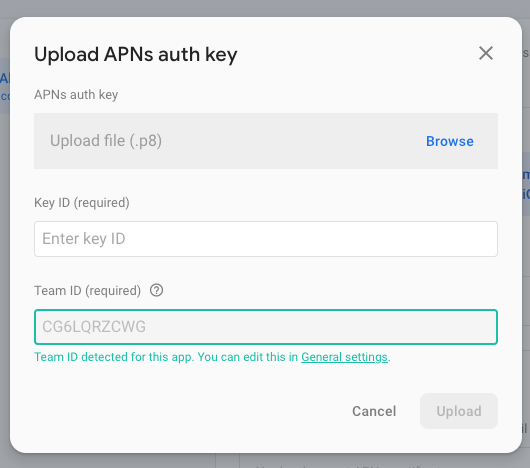
Click on Register Button and download the file.

In the Firebase console, upload the downloaded file and enter your key id(which is mentioned in the download file name (AuthKey_
3. Install and Configure React Native Firebase:
To implement push notifications in the React Native project, you need to use a react-native-firebase package. To install React Native Firebase package, run the below command:
npm install –save react-native-firebase
Next, link the react-native-firebase to native iOS and Android apps by typing this command.
react-native link react-native-firebase
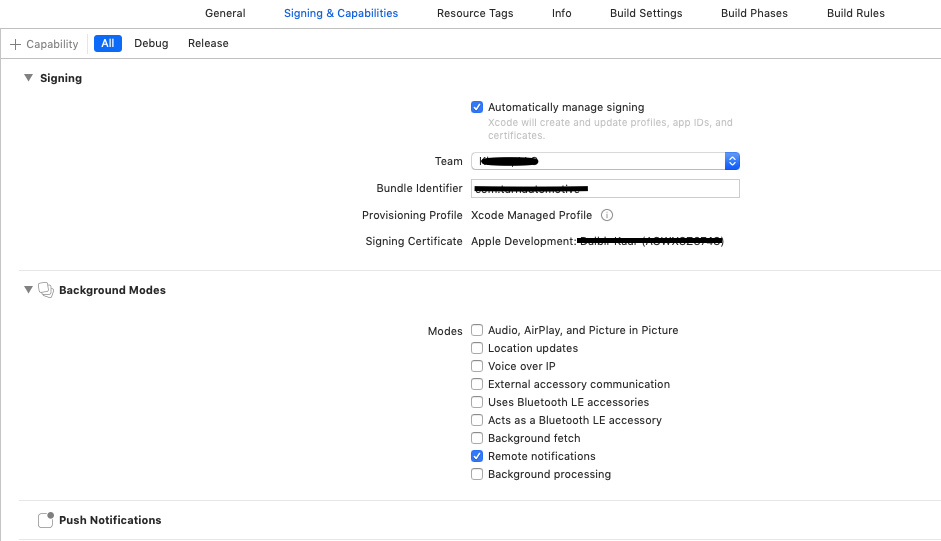
4. Setup React Native Firebase on IOS:
Turn on Push Notifications and Background Modes(Check only Remote Notifications) capabilities in Xcode. Make sure these are turned on in your project certificates.
Next, add the below lines in the `Pods/podfile` file.
pod 'Firebase/Core', '~> 6.3.0'

  pod 'Firebase/Messaging'

  pod 'RNFirebase', :path => '../node_modules/react-native-firebase'
Run below command from the terminal inside the `ios` folder.
cd ios && pod update
open and edit `ReactNativeFcm/AppDelegate.m`
Add these imports of the Firebase, React Native Firebase Notifications, and Messaging.
#import

#import "RNFirebaseNotifications.h"

#import "RNFirebaseMessaging.h"
At the beginning of the `didFinishLaunchingWithOptions:(NSDictionary *)launchOptions` method insert below lines to initialize Firebase and RNFirebaseNotifications.
[FIRApp configure];

[RNFirebaseNotifications configure];
Attach a new method to get RNFirebaseNotifications local notification.
- (void)application:(UIApplication *)application didReceiveLocalNotification:(UILocalNotification *)notification {

  [[RNFirebaseNotifications instance] didReceiveLocalNotification:notification];

}
Attach a new method to get a remote RNFirebaseNotifications.
- (void)application:(UIApplication *)application didReceiveRemoteNotification:(nonnull NSDictionary *)userInfo

fetchCompletionHandler:(nonnull void (^)(UIBackgroundFetchResult))completionHandler{

  [[RNFirebaseNotifications instance] didReceiveRemoteNotification:userInfo fetchCompletionHandler:completionHandler];

}
Add a new method to register to the Firebase and get FCM token.
- (void)application:(UIApplication *)application didRegisterUserNotificationSettings:(UIUserNotificationSettings *)notificationSettings {

  [[RNFirebaseMessaging instance] didRegisterUserNotificationSettings:notificationSettings];

}
5. Receive Push Notifications
Open App.js component of your React Native project and modify file as per below:
import React, { Component } from 'react';

import {Platform} from 'react-native';

import firebase from 'react-native-firebase';

import type { RemoteMessage, Notification, NotificationOpen } from 'react-native-firebase';

export default class App extends Component {

   constructor(props) {

       super(props);

   }

   componentDidMount() {

   	this.checkPermission();

   	this.createNotificationListeners();

   }

   componentWillUnmount() {

   	this.notificationListener;

   	this.notificationOpenedListener;

   }

   //1 check notification permission is enabled

   async checkPermission() {

       const enabled = await firebase.messaging().hasPermission();

       console.log(enabled+' checkPermission');

       if (enabled) {

           this.getFcmToken();

       } else {

           this.requestPermission();

       }

   }

   //2 request for notification permission if not enabled

   async requestPermission() {

       firebase.messaging().requestPermission()

       .then(() => {

           this.getFcmToken();

       }).catch(error => {

           console.log(error+' error');

           console.log('permission rejected');

       });

   }

   //3 get FCM token

   async getFcmToken() {

       fcmToken = await firebase.messaging().getToken();

       console.log(fcmToken);

    }

 // Notification listeners

   async createNotificationListeners() {

       /*

       * Triggered when a notification has been received while the app is in the foreground state.

       * */

       this.notificationListener = firebase.notifications().onNotification((notification) => {

           const { title, body } = notification;

           console.log(notification);

           console.log('onNotification:');

           console.log(title);

           console.log(body);

           // to display notification on the screen

           firebase.notifications().displayNotification(notification)

           .catch(err => console.error(err));

       });

       /*

       * Triggered when your app is in background, user can listen for notification is clicked/tapped/opened event.

       * */

       this.notificationOpenedListener = firebase.notifications().onNotificationOpened((notificationOpen) => {

           console.log(notificationOpen.notification);

           const { title, body } = notificationOpen.notification;

           console.log('onNotificationOpened:');

           console.log(title);

           console.log(body);

       });

       /*

       * Triggered when your app is closed, user can check if it was opened by a notification using clicked/tapped/opened event.

       * */

       const notificationOpen = await firebase.notifications().getInitialNotification();

       if (notificationOpen) {

           const { title, body } = notificationOpen.notification;

           console.log('getInitialNotification:');

           console.log(title);

           console.log(body);

       }

       /*

       * Triggered for data only payload in foreground

       * */

       this.messageListener = firebase.messaging().onMessage((message) => {

           //process data message

           console.log("JSON.stringify:", JSON.stringify(message));

       });

   }

}
6. Send Push notification from firebase console:
Go to Cloud Notification and create a new notification there.
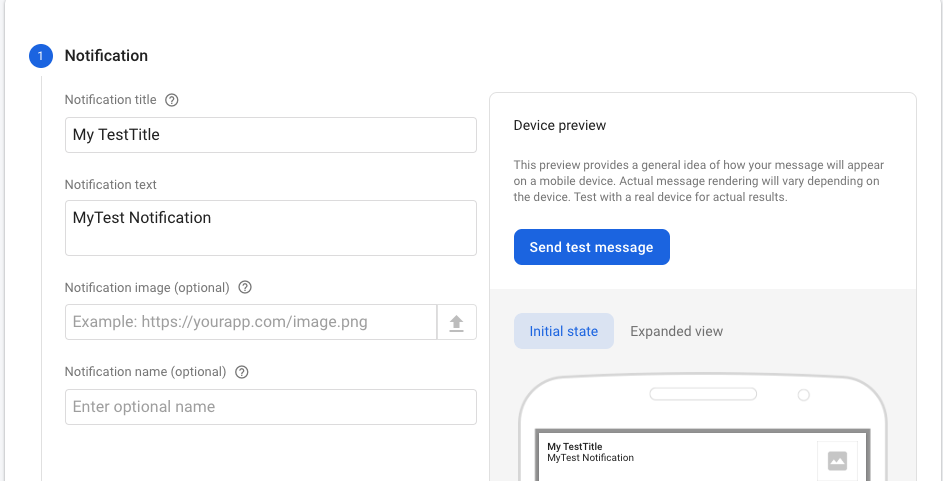
Click on the Send test message button and enter the FCM token that got in the console after running the app.
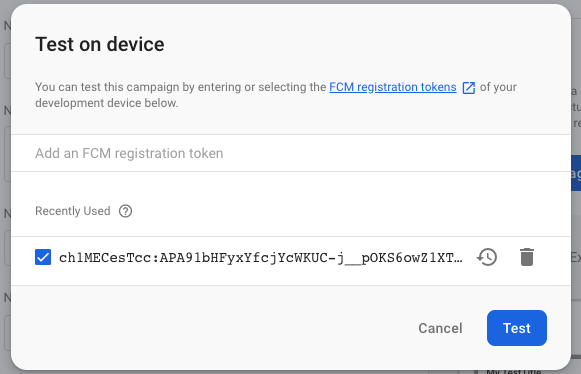
Note: Test it on a real device only.