How to delete and deploy components (Apex classes, Flows, Objects, etc) from production using workbench?
We cannot delete Apex classes directly from the Production org. Also, it is not possible to deploy deleted apex classes using Changeset. So, to delete them we can use these tools – Workbench, IDE, Ant Migration, etc.
In this post, we will get to know how we can add/delete/update various components at a single go from Production using Workbench. This is the easiest and fastest way that does not require any additional software.
We need two XML files to perform operations(add/update/delete) on components.
- package.xml: It is a project manifest file that contains all the components to retrieve or deploy only.
- destructiveChanges.xml: For deletion, we need to create a delete manifest destructiveChanges.xml file.
Both files have the same format.
Step 1. Create destructiveChanges.xml file.
Below you can see the package.xml and destructiveChanges.xml files:
package.xml-
<?xml version="1.0" encoding="UTF-8"?>

<Package xmlns="http://soap.sforce.com/2006/04/metadata">

   <types>

       <members>CustomObject1__c</members>

       <members>CustomObject2__c</members>

       <name>CustomObject</name>

   </types>

   <version>46.0</version>

</Package>
destructiveChanges.xml-
<?xml version="1.0" encoding="UTF-8"?>

<Package xmlns="http://soap.sforce.com/2006/04/metadata">

// To delete specific Apex Classes

<types>

<members>ApexClassName 1</members>

<members>ApexClassName 2</members>

<name>ApexClass</name>

</types>

// To delete specific Apex Triggers

<types>

<members>ApexTrigger Name 1</members>

<members>ApexTrigger Name 2</members>

<name>ApexTrigger</name>

</types>

// To delete specific Custom Objects

<types>

<members>CustomObject__c</members>

       		<name>CustomObject</name>

</types>

<version>45.0</version>

</Package>
Step 2. Now both the files should be archived in a .zip file and ready to deploy your changes to Production Org.
Step 3. Login to your Production Org from Workbench (https://workbench.developerforce.com/login.php). Here is the Screenshot:
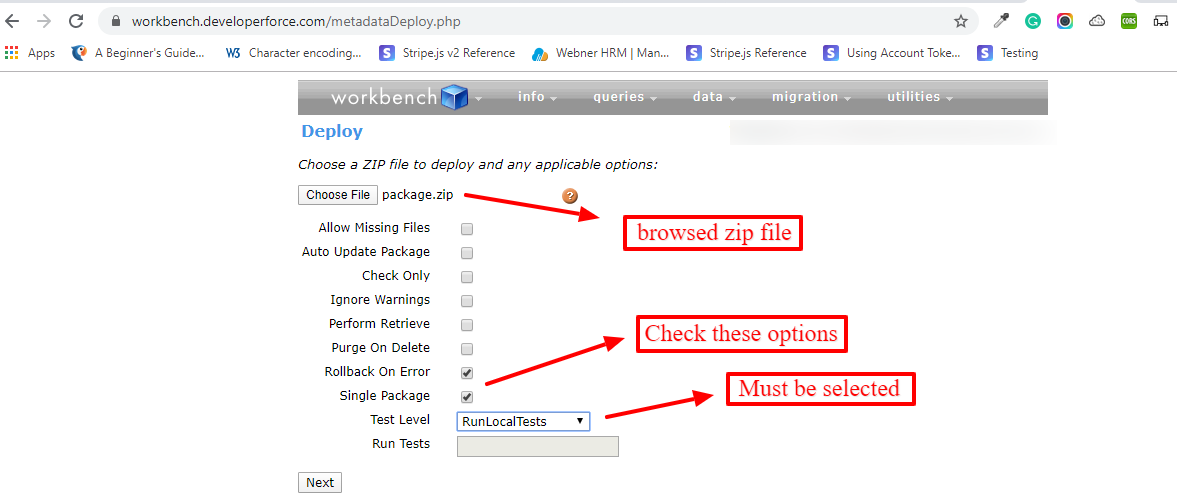
Step 4. Open Deploy page from Migration drop down and browse zip file (containing package.xml and destructiveChanges.xml) to deploy. Here is the screenshot:
Step 5. Click Next to deploy changes.
To add and delete components in single deployment:
You can perform the addition and deletion of components at the same time. It will delete components in destructiveChanges.xml and add/update components in package.xml.
By default, deletions are processed before component additions. The capability to define when deletions are processed is helpful when you’re removing components with dependencies. The process/steps will be the same, the difference is in the name of destructiveChanges.xml file.
- If we want to delete components before adding/updating other components, we have to create a manifest file with name- destructiveChangesPre.xml and include the components in it to delete.
- If we want to delete components after adding/updating other components, we have to create a manifest file with the name destructiveChangesPost.xml and include the components in it to delete.