How to make cell editable on cell double click in DevExtreme DataGrid
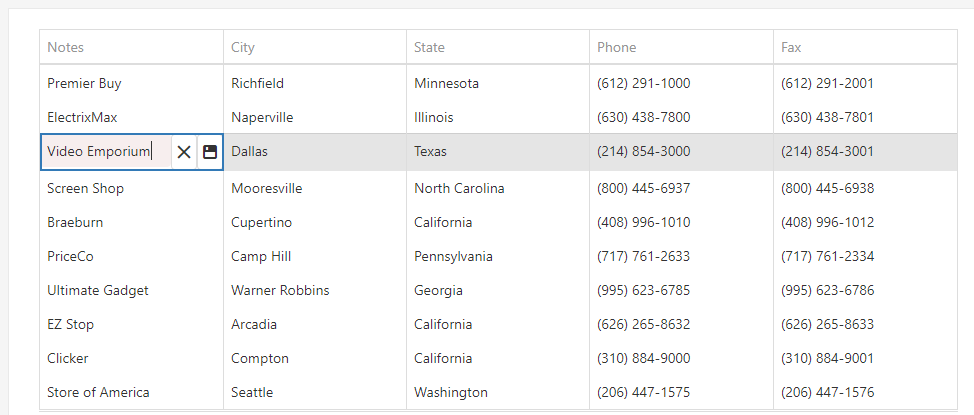
DevExtreme DataGrid
The DevExtreme provide lots of UI feature with the help of which we can enhance the UI of our Application.
In this example, how to make cell editable on cell double click is explained:
Code
Below is the simple client-side code which makes cell editable on cell double click:
$(function(){
$("#gridContainer").dxDataGrid({
dataSource: customers,
showBorders: true,
paging: {
pageSize: 10
},
editing:{
mode:"cell",
allowUpdating: false,
allowAdding: false,
},
columns:[
{
dataField:"CompanyName",
caption:"Notes",
allowUpdating: true,
allowAdding: false,
editCellTemplate: tagBoxCompanyNameTemplate,
},
{
dataField:"City",
caption:"City",
},
{
dataField:"State",
},
{
dataField:"Phone",
},
{
dataField:"Fax",
}
],
onCellDblClick:function(clickedCell){
if (clickedCell.column.caption == 'Notes') {
if (clickedCell.rowType !== "data")
return;
//$("#gridContainer").dxDataGrid('instance').clearSelection();
//the above code used to remove the selected row in the dataGrid.
$("#gridContainer").dxDataGrid('instance').selectRowsByIndexes([clickedCell.rowIndex])
clickedCell.component.editCell(clickedCell.rowIndex, clickedCell.column.dataField);
}
},
});
});
function tagBoxCompanyNameTemplate(cellElement, cellInfo) {
var ds = $("#gridContainer").dxDataGrid("getDataSource").get;
$("<div class='notes-inline-editor-textbox'/>").dxTextBox({
dataSource: ds,
width: "calc(100% - 52px)",
value: cellInfo.value,
valueExpr: "Notes",
displayExpr: "Notes",
showSelectionControls: true,
showMultiTagOnly: false,
applyValueMode: "useButtons",
searchEnabled: true,
onValueChanged: function (e) {
cellInfo.setValue(e.value);
}
}).appendTo(cellElement);
$("<div class='notes-inline-button' />").dxButton({
width: 26,
icon: 'save',
type: 'normal',
hint: "Save",
onClick: function () {
var datGridInstance = $('#gridContainer’).dxDataGrid('instance');
//saveDescriptionButtonClick(); //here you can use your own function for save data.
datGridInstance.saveEditData(cellInfo.rowIndex);
datGridInstance.closeEditCell();
//this code used to close the edit box after changes the data.
}
}).appendTo(cellElement);
return $("<div class='notes-inline-close-button' />").dxButton({
icon: 'close',
type: 'normal',
hint: "Close",
width:26,
onClick: function () {
$("#gridContainer").dxDataGrid("instance").cancelEditData();
//this code used to close the edit box without changes the data.
}
}).appendTo(cellElement);
}
In the above code, The Notes datafield is made editable and this can be done with any datafield of the grid.
The function name “tagBoxCompanyNameTemplate” append three “div” in the particular cell.
Under The first div “<div class=’notes-inline-editor-textbox’/>” create dxTextBox field for edit the data.
Under The second div “<div class=’notes-inline-close-button’ />” create dxButton for close the editable box.
Under The third div “<div class=’notes-inline-button’ />” create dxButton for save the edit data in the dataGrid.
On cell double click a dataGrid function as “onCellDblClick” is called which contains all the operations that are desired to be performed after the action.
The code below is a simple CSS code for enhancing the UI of the editable box.
Css code:….
.notes-inline-editor-textbox {

float: left;

}

.notes-inline-button, .notes-inline-close-button {

float: right;

}

.notes-inline-button .dx-button-content, .notes-inline-close-button .dx-button-content {

padding: 8px 0px;

}

.notes-inline-editor-textbox .dx-texteditor-container .dx-texteditor-input {

padding-right: 1px;

background-color: #e6e6e6;

}