Introduction
Wireshark is an open-source network protocol that is responsible to investigate the network traffic and for visual understanding of packet loss. It is used to troubleshoot the network connectivity and review the TCP (Transmission Control Protocol) transmission between the source and destination endpoints. WireShark is also responsible to examine the Application Layer Session to see header information for both requests and responses, also examine the HTTP session and Malware. WireShark can be installed on Linux, Mac and Windows platforms.
How WireShark Works?
The tool Wireshark is a packet sniffer and analysis tool. Wireshark is able to grab the network traffic on the local network and store that data for offline analysis. It captures N/W traffic from Ethernet, Bluetooth, Wireless, Token Ring, and more. It also allows you to filter the log either before the capture starts or during analysis, so you can narrow down and zero into what you are looking for in the network trace. You can set a filter to see TCP traffic between two IP addresses. You can set it to show you the packets sent from a particular computer. The data packet filters in Wireshark are one of the primary reasons it became the standard tool for packet analysis.
WireShark Installation
-
sudo apt-get install Wireshark
Run the above command in order to install WireShark on your Ubuntu OS. -
sudo dpkg-reconfigure wireshark-common
Now run the above command to configure Wireshark. After executing the command you will find
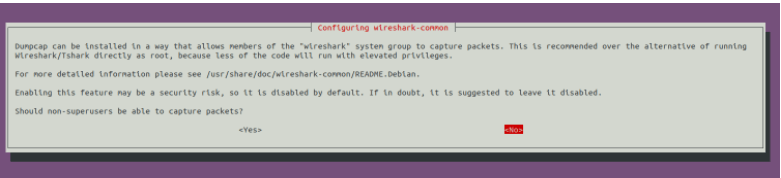
The tool WireShark must be started as root (can also be done with sudo) privileges in order to work. If you wish to start Wireshark without root privileges or without sudo, then select Yes and hit Enter.
-
sudo adduser $USER Wireshark
Now if you have chosen Yes in the earlier step to run Wireshark without root access, then run the subsequent command to add your user to the WireShark group:
-
$ sudo usermod -aG wireshark $(whoami)
Now WireShark is installed, you can start WireShark from the Application Menu of Ubuntu or run the following command.
-
$ wireshark
Some Example with WireShark
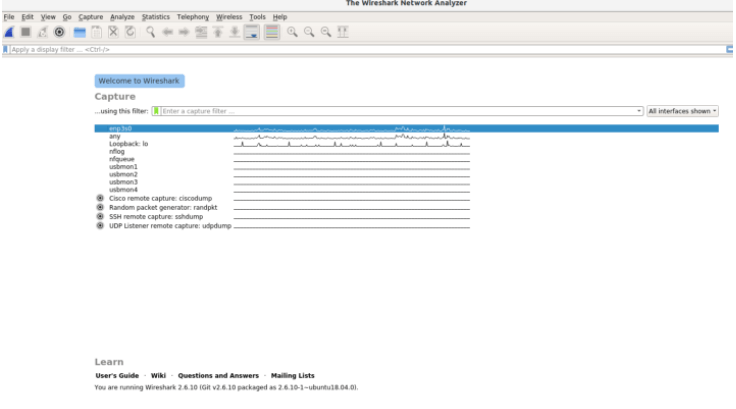
How can you capture the data packets with the help of WireShark?
After running the Wireshark, you can see in the above image that WireShark shows you a list of all of the network connections, and also provide the filter field, where you can capture the specific network traffic you want to see. You can select one or more of the network interfaces using shift left-click.
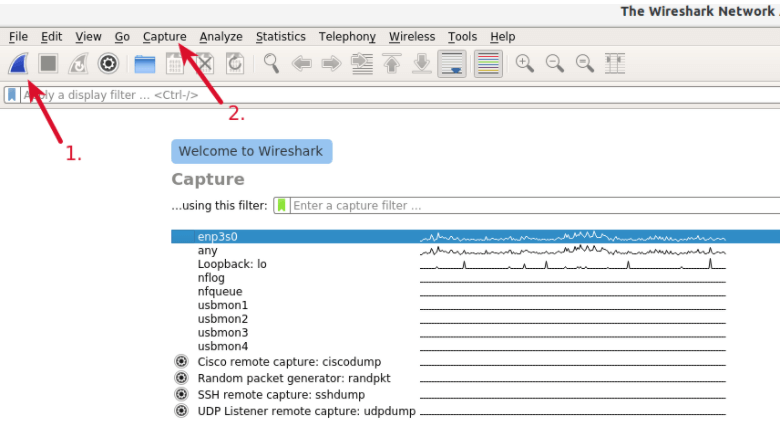
In order to capture the data packets you need to click the first button on the toolbar (pointed with no. 1), or also you can select the menu item “Capture” and start capturing the data packets. Even you could use the keystroke Ctrl+E.
Captured data packets showing below:
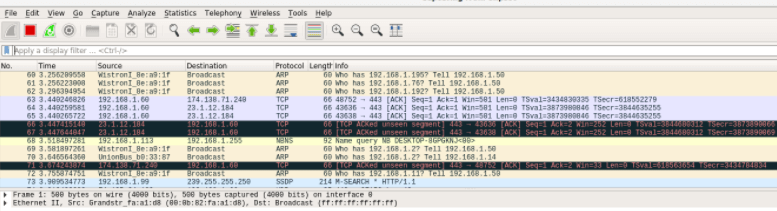
Now you can stop the data packets capturing with the same keystroke Ctrl+E, after it analyzes the data packets.
How to analyze data packets on Wireshark?
The open-source tool WireShark has three different sections for identifying the data packet’s information and inspecting them. In the first section, it shows the list of captured data packets (in the following screenshot “section a”). When you click on any data packet, then the other two sections will show the associated details of selected data packages.
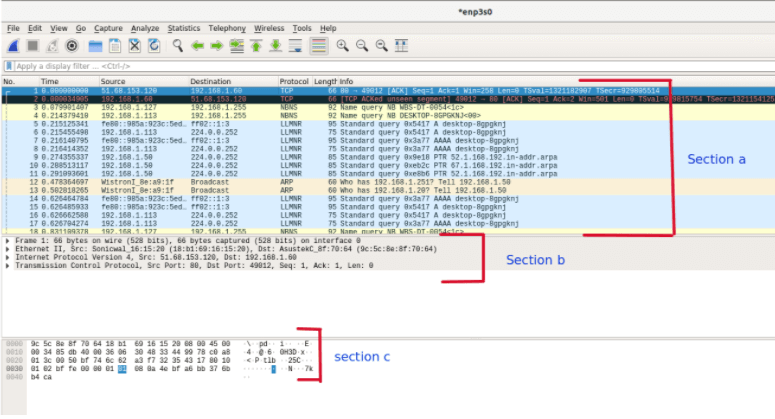
It becomes very easy with WireShark to view all data packages that your system is sending and receiving on the network and investigate the cause of the traffic over the network.