An object storage service called Amazon Simple Storage Service (Amazon S3) provides performance, security, and scalability that are unmatched in the market. Customers of all sizes and sectors can use Amazon S3 to store and preserve any amount of data for a number of use cases, such as data lakes, websites, mobile applications, backup and restore, archiving, business applications, IoT devices, and big data analytics. In order to satisfy your unique business, organizational, and regulatory requirements, Amazon S3 offers management options that allow you to optimize, organize, and configure access to your data. In this blog post, I’ll demonstrate how you can quickly connect your Salesforce Org to Amazon S3 and upload files to an S3 bucket using Named Credentials. When interacting with third-party services, Salesforce manages Named Credentials, a configuration point that handles the authentication procedure. It greatly simplifies the life of an inventor because there is no longer any concern over the issue of a reference commemorative expiring or adding credentials to the remote point settings. Salesforce manages all authentication for callouts that use a specified credential as the callout destination. Okay, now let’s look at how to upload files to an S3 bucket and how to link a salesforce named credential with Amazon S3.
The steps to upload files to S3 using a Salesforce-named credential are as follows:
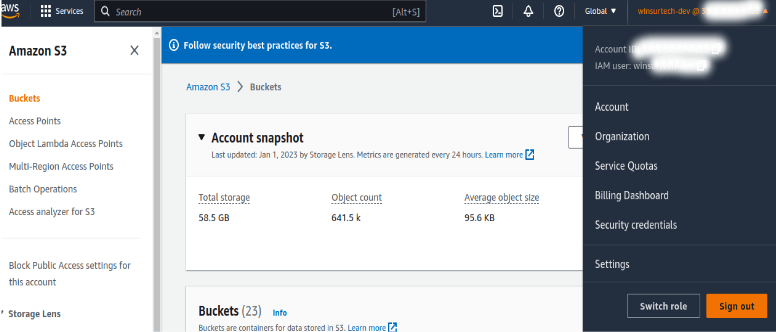
- Go to your account’s AWS Management Console first since we need to integrate with it.
- Get the Access Key and the Secret Key from the “Security Credentials” sections in Identity and Access Management by selecting them from the drop-down menu button by your account’s name in the upper right corner ( IAM).
- Now sign into your Salesforce Org and, as shown below, under Setup Menu, search “Named Credentials.”
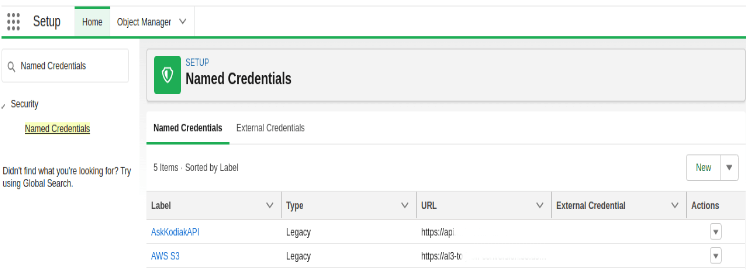
- To create a newly named credential, select New. Enter the values you wish for the label and name (used to identify the identified credential via API) fields. I chose AWS S3 for the label and AWS_S3 for the API name.
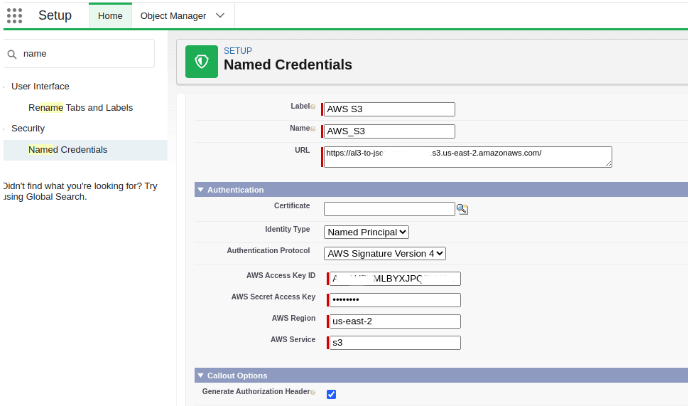
- The URL to enter in the URL field must follow the following pattern:- (scheme)://(bucket_name).(instance_name).(region_name).amazonaws.com/(folder_name)
In our case, it will look something like this:- https://sfdc-bucket.s3.us-east-1.amazonaws.com/ - Choose “Named Principal” as the identity type and “AWS Signature Version 4” as the authentication protocol in the authentication section. By doing so, the four additional fields that must be filled out—AWS Access Key, AWS Secret Key, AWS Region, and AWS Service—will become visible below. When everything is correctly filled out, your named credentials detail section should be something like this: –
We can test the integration of our named credential with Amazon S3 right now by using the Developer Console. From the Developer Console, open the Execute Anonymous Window and enter the following code:
Apex Code:
Now we need to call the getAwstoSalesforce method and add the required parameter to request this method to upload files on s3 bucket from apex code.
global class AwsS3toSalesforce {

@AuraEnabled

global static void getAwstoSalesforce(Blob attachmentBody,String attachmentName) {

Blob pdfBlob = EncodingUtil.base64Decode(attachmentBody);

Http http = new Http();

HttpRequest request = new HttpRequest();

request.setMethod('PUT');

request.setBodyAsBlob(pdfBlob);

request.setEndpoint('callout:AWS_S3/folderName/'+attachmentName);

HttpResponse response = http.send(request);

System.debug(response.getBody());

System.debug(response.getStatus());

}}
Now that the connection to AWS is eventually established, we can simply use the standard HTTP PUT method to store files on the AWS s3, and same like upload files we can use the GET method to get the file from the AWS s3 bucket.