Provisioning Profile for iOS
A provisioning profile binds developers and devices to an authorized iPhone Development Team and enables a device to be used for testing. Just Like android, you can’t install your application directly on the iOS device. Provisioning profile act as an intermediate between the device and the developer account. During development, you can choose which devices can run your application and which application services your application can access. A provisioning profile can be downloaded from your developer account and embedded in the app bundle, and the entire bundle is code-signed.
Following are the steps to create a development provisioning profile:
Step 1
- Log in to the Apple developer account and go to Certificates, IDs & Profiles > Certificates.
- Add new certificate and choose certificate type as iOS development
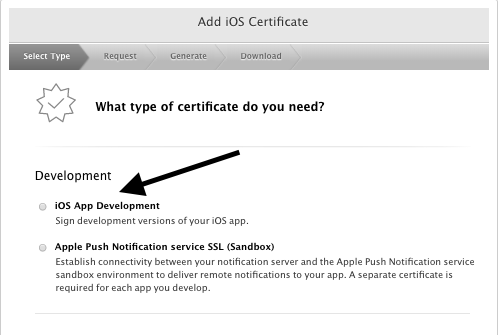
- Click Continue.
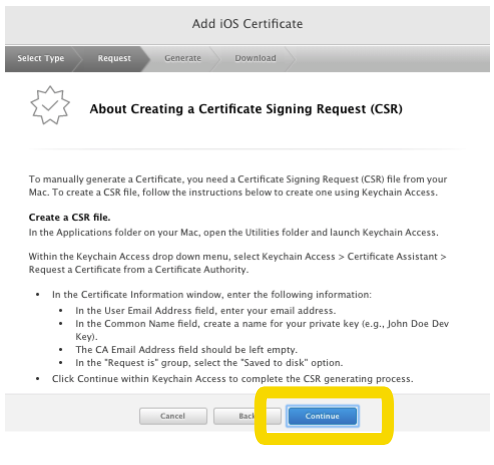
- In the next step, you need a Certificate Signing Request (CSR). Leave the Apple Developer interface page for now. After you create a CSR file, go back to the Apple Developer interface page.
- Go to keyChain access in Mac.
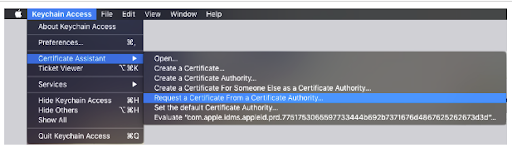
- Go to the Certificate Assistant and creates a Certificate Signing Request (CSR) that is submitted to a certificate authority that verifies the information in the request.
- Enter your Apple ID and email address in the dialog box.
- Click Continue.
- Select a folder for saving the CSR file.
- Click Done.
Step 2
- After creating a CSR file go back to the Apple Developer account where you started to create a certificate.
- Click Continue.
- Select the CSR file you just generated.
- Click Continue.
- The certificate is created and signed.
- Download the newly created certificate.
- Click Done.
Step 3
App ID
An App ID is a two-part string used to identify one or more than one apps from a single development team. Whenever you want to enable a capability or application service for your application, you have to enable that capability for the App ID your application is linked to. The App ID consists of a Team ID and a bundle ID search string, with a dot(.) separates the two parts. The Team ID is provided by Apple and is unique to a specific development team, whereas the bundle ID search string is generated by you to match either the bundle ID of a single app or multiple apps. Bundle ID uniquely identifies an application which means two applications can not have the same bundle ID.
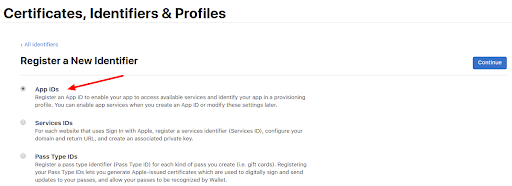
- Go to Certificates, IDs & Profiles > Identifiers > App IDs.
- Click on the + button for creating a new App Id.
- Choose App Id from the options given in the below screenshot.
- Fill in the description and fill in a Bundle ID. The best practice is to use your external domain name backward + app name, for example, com.yourcompany.app.
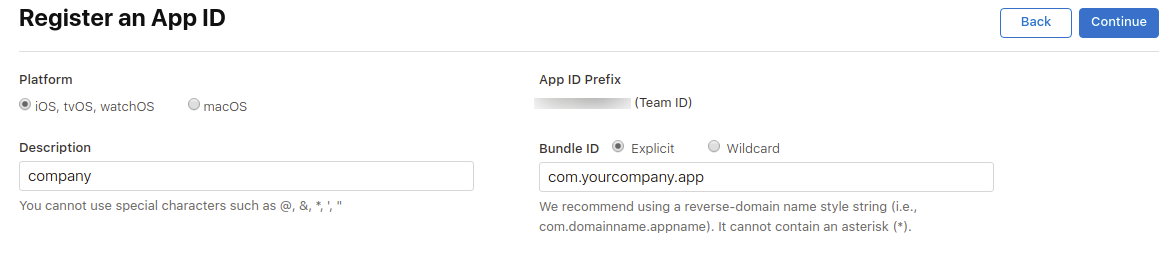
- In the capabilities section, leave the default settings as it is and click continue. An overview of the entered data will be displayed. Review the information and click submit.
Step 4
Now go to the Profile section:
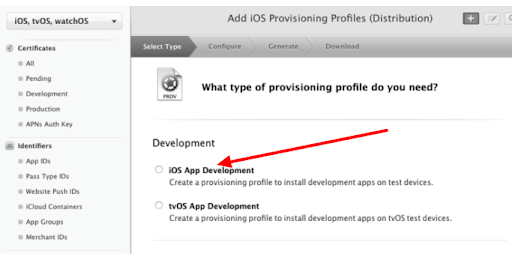
- Click on the add button at the top right to create a new profile.
- Select “App Store” and press Continue
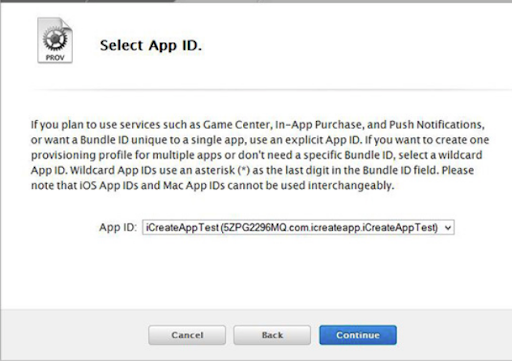
- Select App ID and press Continue.
- Select the Certificate you wish to include in this provisioning profile (the certificate the app was signed with) and click Continue. Next, select the devices you want to include in the provisioning profile. You can add a number of devices in the devices section.
- Add a name for your profile and click Generate. You might want to include “Development” in the name so that you can distinguish it.
- Download the provisioning profile to your machine by clicking the Download button.